Tuesday, 10 January 2017

Return to the Groovin' 60's with Sheena Douglass

Hello lovely peeps!

I hope you are well!.. So, as I mentioned, I have been playing with Sheena's Groovin' 60's collection again and this is what I have made.  I LOVE colour and this is the perfect excuse to use it and lots of it, with these stamps and stencils. They also work really well with some of the Day of the Dead stamps too! (And some of the Rock n' Rock sets.) How fab is that? So why not mix it up a bit and have a play? :)

This stamp makes me think of the Mama's and Papa's, I love their music too. I thought it went beautifully with the guitar stamp and die from the DOTD range as it complimented the one being carried in this scene.


This background turned out a little different to how I first planned but sometimes these things do, happy accidents and all that. :) More about that later...I shall blog again about how I made these.


I hope you have enjoyed another step back in time to the swinging 60's! There are so many possibilities with this amazing collection!

T.T.F.N

Adele
x


Sunday, 8 January 2017

Recycle your calendars with a crafty project.

Hello fellow crafters!

So, a new year begins and we are left with last years calendar. They are often too nice to throw away I think, therefore, why not put them to some good and use them in a crafty project!


For this creation, I was able to combine it with Sheena's A Little bit Floral Lilly stamp and some dies by Sara Davies. I love the work of Alphonse Mucha, he is one of my favourite artists. For the backing paper, mounted on to an 8" card, I used the butterfly paper from Sara's English Country Garden pad. I added an embossed layer with a Crafter's Companion folder and then a panel of gold mirror card. The foliage and Lillie's were arranged between the gold card and the Mucha image 'Language des Fleurs' (1900.) I backed the art image on to white card with double sided tape. Then I arranged the flowers and flourishes and attached them to the back of the panel. It was then mounted with 3D glue and the larger flowers were added over the top to finish,  They were coloured with Aquablend pencils and gold foil highlights were added to the petals (spots) and the stamens. The main lillie's were decoupaged.


I hope this has inspired you not to throw your old calendars away just yet! You might be able to do something wonderful with them. :) 


Products used:

Sheena Douglass Lilly stamp set
Embossalicious Regency Damask folder 8"
Sara Davies English Country Garden paper pad ( cream butterflies)
Sara's Leafy Flourish dies - Floral Delight
Sara's Fancy Flourishes dies - Buttefly Lullaby
Sara's Graceful Swirls dies - Together Forever collection

Adele
x


Thursday, 5 January 2017

Vintage Christmas Angel card with Sheena Douglass

Hello everyone,

The Teamies have been running challenges since September and I offered to undertake the recent one and chose the theme of 'Vintage Christmas'.  Sheena has released so many lovely Christmas stamps and dies that would fit this subject well, so I thought it would give the Ink-ettes a lot of scope to play with.

I love Vintage and always like an angel at Christmas so I created this. I combined a few different things from Sheena's collections to make this as they work so well together, sometimes, even things you wouldn't think of. :)


I started by stamping  the 'Simply Scriptly' stamp in Versa Mark around the edge of a 7 .5" panel of white card. You need to stamp, heat, stamp, heat... to achieve this. Blue and green Aquatints were then sponged on to the surface. They resisted the clear embossed powder, leaving the text white. 


I then flicked liquid Pebeo gilding paste on to the panel with a fine brush and when it was dry applied silver foil. 


A square measuring 6 1/4" was drawn on to white card and then the edges were torn roughly to give texture. Always tear towards yourself, so you get the fancy edge on the top of the paper. Distress Ink was used to colour this. I added Pebeo Mixtion relief glue to the edge of this with my finger. If you go over it again a few seconds later, as it starts to dry, it gives you more texture as it holds your finger prints. I like this as it makes it look more distressed and almost icy like, which is good for festive cards.  Drops of water were also sprinkled over the background - faux bleach technique.


Before adding the foil around the edge though, I took Sheena's Tie Die stencil from her new Groovin' 60's collection as I thought it would make the perfect halo for my angel. I laid it over the background and then took my Versa Mark ink pad and pressed it down over the top. After taking the stencil away, I then applied WOW silver glitter embossing powder. 


The 'Christmas Child' was stamped twice so I could decoupage her holly crown. She was coloured with Aquablend pencils. The 'Divine Inspiration' wings were stamped twice (the same side - need to be facing same direction on this design) with Versa Mark and heated with WOW white puff embossing powder. I love this one as it gives a fluffy appearance, perfect for angel wings! 


The Christmas rose from the same set as the child was stamped several times so I could layer the image and add depth. 


I then went on to stamp the holly, little bird and the sentiments. The card was completed by using a clear sparkle pen on the wings and her dress, Glossy Accents was added to the berries. Finally it was mounted on to a 8" card with a backing of silver glitter card to compliment the rest of the glitter and shimmer. Spots of Stardust Stickles were then randomly applied to the surround of the angel.


Sheena products used:

Simply Scriptly stamp
Christmas Child stamp set
Divine Inspiration
Deck the Halls stamp set

I hope you have enjoyed this project and feel inspired to have a play yourself. :)

Adele
x


Wednesday, 4 January 2017

Groovin' 60's Techniques for Sheena

Happy New Year lovely crafters!

I hope you are all well and that 2017 brings you health, happiness and lots of craftiness! Sorry it's been awhile since I posted, things have been hectic over the festive period and I've caught a cold for the second time... anyhew... hoping for no more germs this year, too much crafting to do!! Isn't being ill so boring? Especially when you have a crafty, active mind!

So, as always, as promised, here are some of the techniques I used on Sheena's fabulous new collection Groovin' 60's. It's a great excuse to use full on colour with no apologies! Let yourself go!

I stamped all the 3D flowers I made with Versa Mark and embossed them with black powder. I liked the effect it gave and it allowed me to play more with the colours, whilst they did not bleed into each other. These are the blooms I created for the Flower Power heart wall hanging.


It's easy enough to find these wooden heart plaques quite cheaply. I used the tie die stencil on it with texture paste and then I highlight these with gold foil... Let the Sunshine in...  :) You can see the finished heart on my previous post.


I adore Sheena's 'Hattie' stamp. For this card I wanted to give a nod to tie die and give the card a lacy floral edge. So I created a panel, just smaller than the 8" card I would mount it on.  I stamped the flowers randomly in a square with Versa Mark and embossed them with clear powder, this is a great technique as it resists any colour you add to it, keeping the original colour underneath visible. You can stamp a few at a time and then heat and emboss before starting again.


Then I sponged a mixture of Aquatints on to the background, added salt and left it to dry, so it would create patterns and texture. I chose colours that would contrast nicely with the lady.


Hattie was stamped out and an extra hat brim as I wanted her to have some extra depth.


The same technique was used on the dancing girls card, I then went over with it with Hickory Smoke Distress Ink.


The flowers were then painted with Aquatints. I wanted a strong contrast between the bright colours and the monochrome that was also popular at the time.


The ladies were stamped and cut out and then because I wanted them really black, I went over them with a black Pebeo pen. The sentiments were created with silver glitter embossing powder. I then completed this card by adding extra flowers which you can also see in my previous post.


Sheena is a huge Dusty Springfield fan so I wanted to create something really special for her. So with the Diva stencil I designed a canvas and incorporated much of the collection, along with another Sheena stamp that fitted the theme. I began by painting the background and adding texture paste with the stencils.


Painted over the texture paste.


These stencils reminded me a little of peacock feathers so when I painted them with the Pebeo paints I drew from that inspiration.


I then added flowers, the records and the microphone ('Sing') from Sheena's Rock and Rock collection, Foil was also applied to this. To compliment the microphone and highlight 'Dusty' I also added streaks of gold foil to her hair and this was the result. The aim was for it to look like a concert poster or album cover. 


And the other good thing about this collection is that you can also make some great cards for men. For this card I used the  Crazy Perspectives stencil, love this. I wanted to create something graphic and strong, to fit the stencil well. I used Distress Ink, cut out circles randomly and then mounted this on red card. 


I was thinking of the mod colours and the credits to a certain group of spy films. Spy holes looking for Bond! I cut the centre out with a circle of rays as I wanted it to present the character...like tah-dah! I stamped the guy, cut him out and then darkened him again with a black Pebeo pen.


I haven't finished playing with this collection yet, I have lots more ideas coming up with these which I hope to share with you soon. :)

T.T.F.N

Adele
x


Wednesday, 7 December 2016

Groovin' 60's with Sheena Douglass

Hello lovely crafters!

I hope you are all well and ready for the festive season! Not long now!

Sheena is back tomorrow with a fabulous new collection, Groovin' 60's. All the Teamies have been having such fun with these stamps and stencils. We are really getting into the swing of this now and we know you will too. The shows start on Hochanda tomorrow at 8pm and then continue Friday at 9am, 12pm, 4pm and 7pm. You won't want to miss them, Sheena will have lots of amazing demos.

Another brilliant thing about this collection is it allows you to go full on colour with no apologies and I do love colour!

This is 'Hattie'. I adore this stamp and its easy to decoupage too, so you can really make her hat stand out. With this card I also wanted to give the impression of tie die with the surrounding flowers and then go very bright too.


Sheena is a huge Dusty Springfield fan, so I wanted to make her something really special, so I created this canvas with a mixture of the stamps and stencils. They work together so perfectly, and also with some of the other music stamps from a previous release.


These swinging chicks are really getting into the groove. For this I wanted to give a nod to the monochrome that was popular at the time as well as the vivid colours. 


And then came the flower power! I was feeling the peace and love with this home decor piece, because I'm really a hippy at heart!


This new collection is also great for men's cards. The mod colours spoke to me for this creation. I wanted it to be be quite strong and graphic. 


So, are you ready to step back in time and get your 60's groove on? Dive into the spirit of the era and enjoy!

T.T.F.N peeps!

Adele
x


Thursday, 24 November 2016

Reindeer in a Winter Wonderland with Sheena Douglass

Hello lovely peeps,

I hope you are all well..I almost forgot, 'tis the season to catch the lurgy!! So, sadly, I've not been feeling great this last couple of weeks...hoping to shift this horrid thing soon...

Anyhew, I am happy to announce that it's my turn to do an inspirational post for Sheena again :)  and seen as how the festive season is upon us I thought I would create and share a Christmassy card.

For this one I have used Sheena's fab Reindeer from her Almost There stamp collection. I adore this as I love these magnificent creatures and am a huge lover of polar bears too. Anyone who knows me, is aware that I am a great animal lover, another reason I admire Sheena's stamps!


Apologies that there are no step by step photos for this but I will talk you through it.  

1.   Firstly, I took the Wishes of the Season stamp set from the recent Scenic Winter launch. The tree scene was then stamped on to a white panel 7.5" square.

2.   I die cut a circle for the moon and applied it to the background with stick and stay. I wanted it peeping from behind the trees. 

3.   I then used Distress Inks and created a night sky with northern lights. Don't worry if you get a slight white halo around the hills, this makes it look like snow is blowing off them. ( I used an egg shaped smoothie, you can get closer with these as they have a point.) Sprinkled it with water droplets (faux bleaching) to give the impression of snow falling.

4.   Then I masked the landscape off with a piece of paper. I flicked Pebeo gilding paste liquid on to the sky part with a fine brush and once it was dry added silver foil.

5.   I Peeled off the die cut moon and then gently wiped some of the remaining blue on the smoothie across the moon so it was not shocking white against the sky. You don't need to add more ink, it has to be a faint hint of colour. 

6.   The Evergreen trees from the Scenic Winter collection were then die cut, coloured (with Aquablend pencils) and layered on to the scene, glued flat, the middle tree just slightly standing away from the moon. Cosmic shimmer white glitter was then added.

7.   I stamped the reindeer on a a 7.5" piece of card. He was cut out as though he was standing on a raised piece of ground, so this would add depth. He was layered up with 3D glue. I then also added white glitter to the landscape and to create snowy drifts applied random streaks of white liquid pearl glue and sprinkled it with white glitter. 

I hope that helps. :)  Thought I would also share this with you, designed with the same stamp set. I created a northern lights sky again with Distress Inks. Ran a clear sparkle pen over the top section in a few wavy lines and then silver foil was used in the same method as explained above to suggest stars. The polar bears were stamped with versa mark and then black embossing powder was applied. The ground was extended by drawing lines with an Versa mark pen and again adding black embossing powder.  I thought this was a simple but effective little card to make. 


So just to recap I have used Sheena's...

A little bit sketchy Almost There stamp set

Scenic Winter Collection
Wishes of the Season stamp set
Evergreen Trees die.

Distress Inks:
Blueprint Sketch
Chipped Sapphire
Twisted Citron
Seedless Preserves (Polar bear card only)

Black embossing powder
white glitter
White liquid pearls
Clear Sparkle pen.

I hope you are feeling inspired! I love the way Sheena's collections combine so perfectly, so now you can see that the Scenic Winter stamps and dies will look great with other ranges too. Have a play. You know you want too! :)

And now it's time to love you and leave you... there is a bottle of cough medicine calling me...yes, I'm here....

T.T.F.N peeps

Adele 
x


Tuesday, 1 November 2016

Time Traveller Techniques for Sheena

Hello crafty peeps!

It's really great to see that's lots of you already have the Time Traveller collection and you have been making some great creations! :D

They really are the most amazing stamps and dies to work with. Another triumph from Sheena!

As promised here are some of the techniques I used... so where to begin.. I'll try not to waffle too much but there are lots of photos.. I will, promise... lol.. I think it is best to go through this systematically ...so let's start..

Backgrounds..

One of the main things for this collection is, you get to play even more... as you need lots of fab backgrounds with lots of texture!

So this is the verdigris technique you will have seen Sheena demo, using the metallic Pebeo paints and Aquatints, the white from the Essentials set and the teal from the brights. I painted a panel of black card in a textured way, neat, with the Pebeo and then when that was try, mixed the two Aquatints to created the rusty look. Whilst it was still wet I sprinkled it with table sale and left it to dry for a better effect.


Other papers created..stippled and smooth textures...


Fleather painted metallic...


Ghostly cog background. I created this so it looked like the cogs were coming towards you out of the steam. To do this you need to stamp with Versa Mark and go over them with Distress ink. At first it may seem like this is not working so well, give it time, as the ink sinks into the card it will resist the Versa Mark more..

Crafty Tip:  If you decide you like this look, stamp a few pieces of card with the Versa Mark cogs BEFORE you move on to stamping with darker ink.. the reason being, it's hard to clean them afterwards and you need them VERY clean to do this technique well. Any hint of another colour ruins it. 


Northern Lights Balloon card

I created the sky for this using Distress Inks, I've done this with Aquatints before now I wanted to try DI's. 


I only wanted a trail of stars along the top of the card to indicate height in the atmosphere as if the characters were rising through the northern lights sky. I took some roughly torn  paper as I didn't want the stars in a straight line, wanted them natural... Flicked Pebeo liquid foil paste from a brush on to the background, allowed it dry before applying the silver foil.


I stamped the sentiment, thought this was the perfect one... I wanted this card to look magical and haunting, the calm before the storm in story.. added glittery whisps by just running a clear sparkle pen across the top of the sky in wiggly lines. The black die cut balloon was then added, coloured and shaded with gilding wax.


Vintage balloon card

So this card was created as the 'flying through the storm' card. I wanted it too look very vintage and a bit eerie... others have called this "magical" which is lovely.  In the centre of the blizzard fly our friends, the quiet in the centre of the storm.. I took a 8" white card panel, marked off a edge round each side with a pencil and tore it roughly down to 7.5 inches. 


Stamped it with Sheena's Christmas postcard stamp in brown ink. Then DI's were used on it. The middle doesn't matter no one would see that, till now! lol.. 


Created another smaller panel, stamped the cogs around the edge with versa mark and went over them with DI and it resisted the cogs, so they looked ghostly.  I then sprinkled this with drops of water (the blizzard) and flicked Pebeo liquid glue on to it and applied gold foil when dry.


To stamp the steam I inked up the stamp, only in that place and applied it to the background where I wanted it by folding back the rest of the stamp. It only stamped the steam nothing else.  I cut the balloon and coloured it with DI, also adding gilding wax highlights. It was shaped and applied to the card with 3D glue. The bottom boat section was decoupaged so it curves out and gives more depth. The edge of the paper was then distressed with my nail. 


Canvas - Professor Ernest in his lab..

I really wanted my canvas to be an important part of the Steampunk adventure I was telling.. so I created a whole scene... started by taking some cardboard and distressing it.


Took my canvas and painted it with black gesso, adding tissue paper for texture..


Painted canvas with a mixture of the metallic paints, after adding torn cardboard, paper die cut cogs and black sand texture paste, (which does take awhile to dry, you can do other things whilst this is happening.) 


After texture paste dried, added gold/copper Pebeo paint and then used verdigris technique.


Started to add other elements..


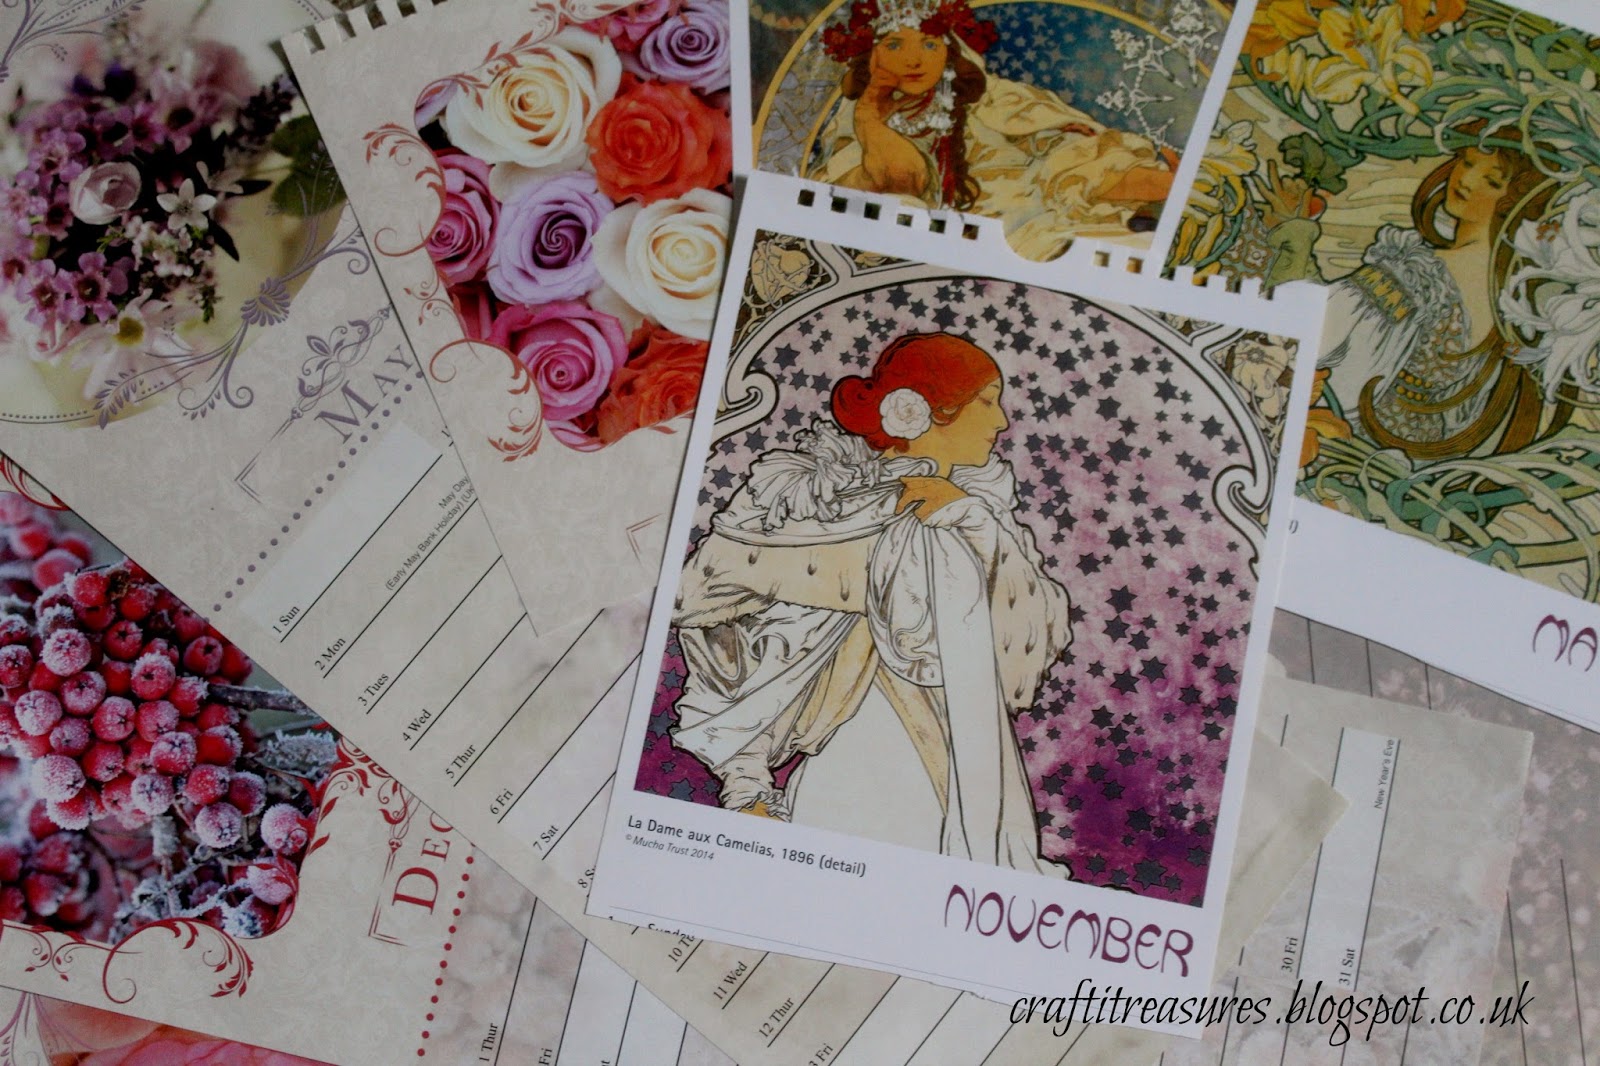
Clocks and Time Cards

So this is the background for my 'Sands of Time' card


Base for pocket watch card... The sentiment was stamped and embossed with black powder, this means you can run gilding wax over it.


My clock card with glittery aged paper.. DI's with the faux bleach technique, also sprinkled Pebeo glue over this and added gold foil. I like the gold speckles this creates, it makes me think of molten metal, which is appropriate for Steampunk.  Sponge was ready to apply Gold Aquatints around the edge..


Sponged on, slightly watered down gold Aquatints.. love the swirly effect I got with this. 


Hourglass card. I applied a Versa Mark pen to this and sprinkled cream and gold embossing powder on to the sand part of this...


Hourglass background, sprinkled with gold, copper and cream embossing powder. I wanted it to look gritty as if some of the sand had escaped.. 


Cog Journal

For this I took some Kraft card and painted it with the copper Pebeo paint. Stamped on to it with the torn stamps using black embossing powder and cut out the middles.


Stamped the cogs in brown ink on to the front of the notebook, so they would peak through.


Stamped more cogs on the the front with Versa Mark and embossed with black powder. Highlighted these with gilding wax and added cogs to poke through the holes.


To the Skies!! Diorama card.

Lizzie, belle of the airways, had to have a real flying balloon! I started by stamping her out a few times so I could use certain elements to decoupage. She was coloured with Aquablend pencils. I also cut out an extra piece of the raised lens of the goggles.


Created the diorama in black card and sponged it with gold Aquatints. Added a plain black panel to the centre. The back wasn't the same as the front as my DI's inks were starting to dry up! Needed refills! 


Front with the ghostly cog technique and finger print gold foil random across it, also droplets of gold foil. The front panel was double strength it was white card mounted on to Kraft card and then the square was cut out, I like to make sturdy cards.


Wanted the sky inside to look like a early morning with hints of sunlight peaking through gathering clouds as if a storm was ahead. Not a great photo as couldn't use flash for this, wanted you to see the colours, hopefully you get the idea. Used the faux bleach technique on this as if it was starting to rain.


The floating balloon!! I was really giddy when I had this idea! lol. So, I did it by gluing a strip of acetate to the underneath of the sky panel and then the other end to the back of the balloon. It was strong acetate and I curved it to hang inside the diorama, Lizzie wouldn't have it floating too far away would she! ? ;) 


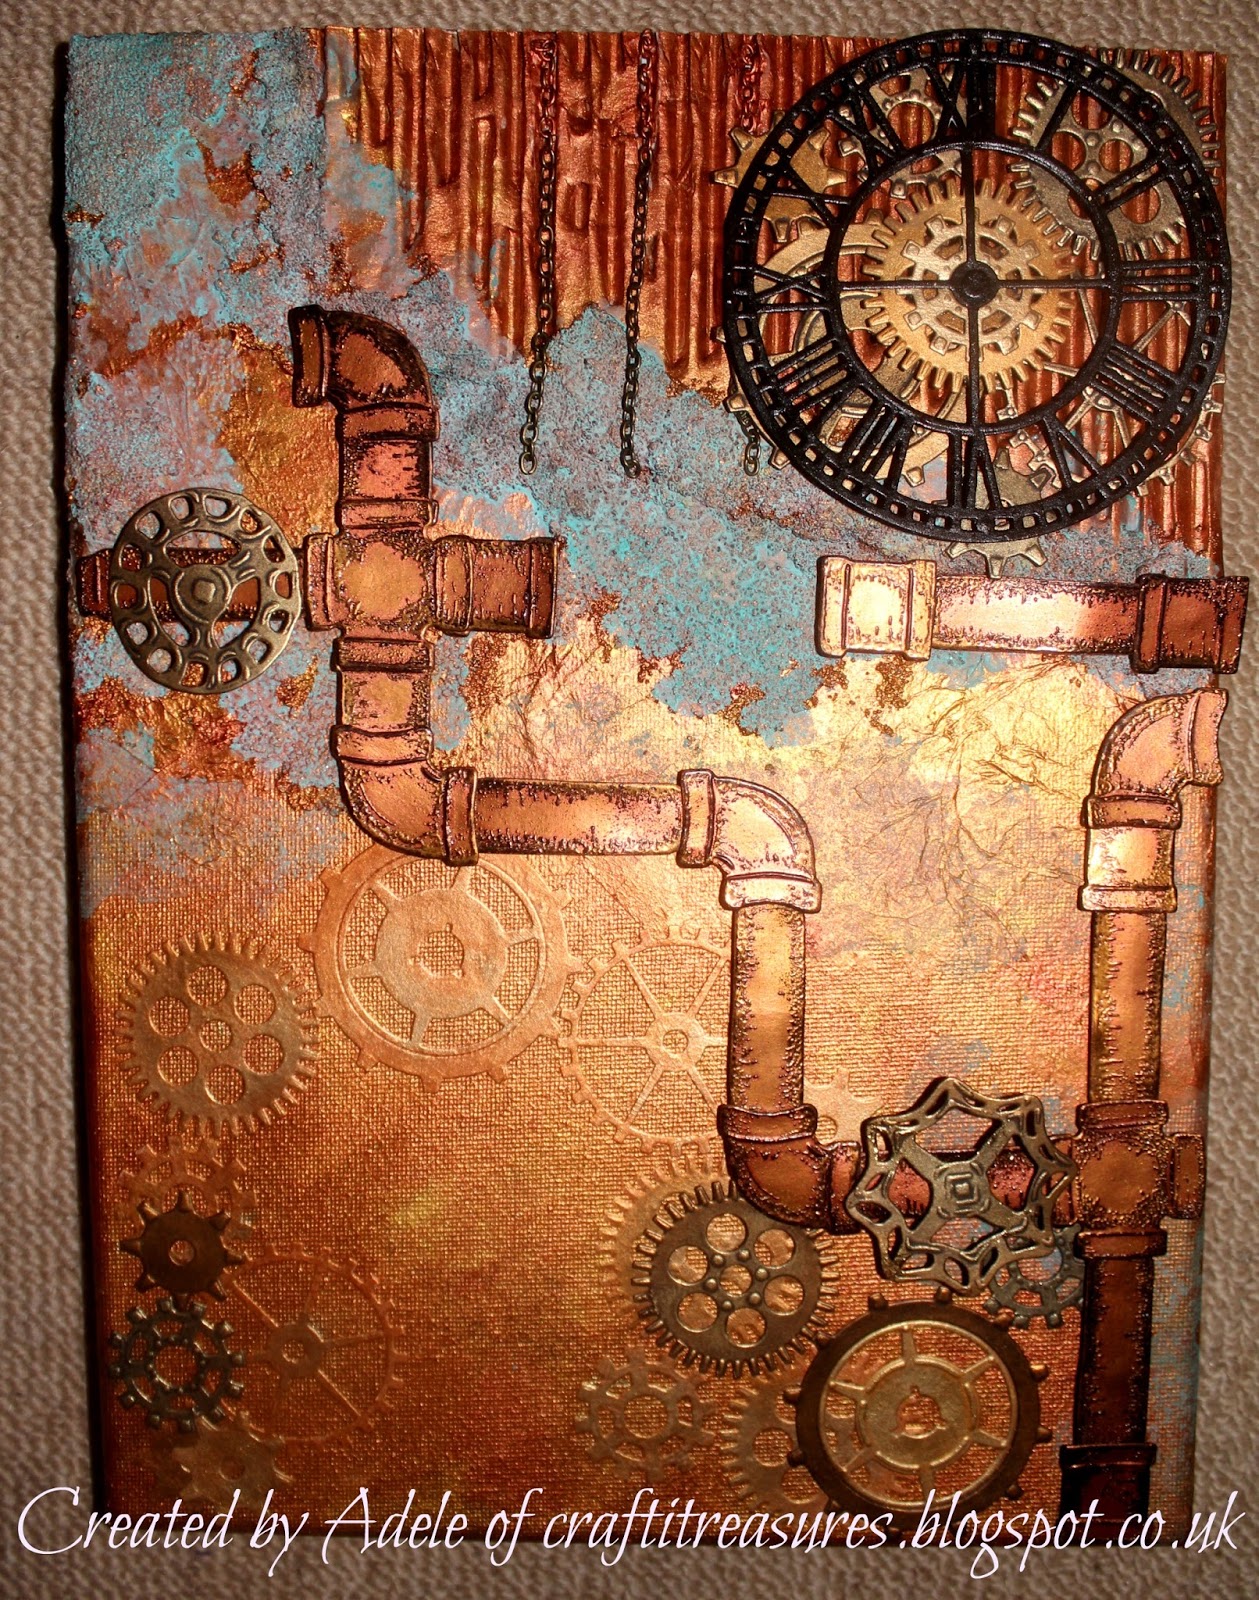
Steampunk Machine card

So this was created by first using the backgrounds I'd made. The gold fleather and the verdigris.


I wanted the pipes to have some real texture and tone to them, look aged instead of just flat... I stamped them with Versa Mark and added black embossing powder and then shaded on top of this with the gold gilding wax. You can see the difference in this photo.


Started to construct the card. Curved the pipes and added foam tape underneath them to give dimension. 


Propeller card

I wanted you to see that you could also create a simple card that looked effective, with a nice background and one die and stamp. So, verdigris background, cut the propeller out of some black card sponged with Pebeo gold paint.


Used Versa Mark to stamp propeller and added black embossing powder.


Gilding wax over the top


Created a flag and stamped sentiment, used black embossing powder and added a hint of gilding wax.


Then, I needed a centre for the propeller, so I made my own. Found some pearls the right size but not the right colour. Painted one of the large ones with black gesso and then when it was dry I was able to rub over it with gilding wax.


Sir Edward and his Time Machine...

Firstly, I stamped out the gentleman and die cut and stamped the goggles. I added acetate lenses to the goggles too. His moustache was decoupaged. 


I stamped the Thingamabob on to the panel of white card in the top corner. Applied drawing gum to it and then created a cog background around it.  I also stamped around the machine the Grunge Band stamps as I wanted it to look like his Time Machine had just started to settle and was winding down. I applied foil to parts of these. And, as you saw Sir Edward sits on top of this.


Hello, are you still there? lol.. That was a long one wasn't it... but informative I hope. ;) 

Now I'm off to do something Steampunks do best.. make a cuppa! If only I had cake to go with it!...sigh....

T.T.F.N peeps

Adele
x