This is a post I have been meaning to share since I created the cards for Sheena using the A Little Bit Festive stamp collection. I had a light bulb moment...*ping* after the show... it does happen sometimes, so let's make the most of it...lol.. I thought it would be a good idea to share with you the techniques I used on these cards (in the last post) and then you too can try them out if you like. They are really fun and it's great to play. Every time I make something, I like to push myself and try a new technique and experiment, and then I make new discoveries along the way.
As it happens I did not take step by step photos of the ones created for Sheena and Hochanda as the brain wave came after the event... so I have created a new project using all the same techniques, used across all my samples, in one card... are you ready? lol.. here goes!
First I started by taking a piece of Sheena stamping card and marked out a 7" square on it. This gave me a guide to tear a rough edge along. Always tear toward you and then you get the texture on the top of the card or paper.
Then I ended up with this, my base to work with. This is same method I used on the background of the Silver Bells card.
Next I took the Aquatints, the Landscape set, using colours blue (08), dark blue (03) and green (22)
and began to sponge them on to the card, leaving white patches for some of colour to take completely and then it would blend where it overlapped. I did this in the order shown above and this is the technique that was used on the Noel card.
So I ended up with this. I love the effects you can get with Aquatints, they can be really dramatic.
Then I turned to the Mixiton Relief from Pebeo. Oooh, so love this too!
It was applied along the rough edge I created and then I pressed it down with my index finger. A little tip... if you do this and then do the same on the second side of the card, you can go back to the first application a few seconds later and press your finger into it again. Because it has already started to set to can get a deeper impression of your finger and it gives you more texture. I also think it gives you a great effect being on the torn card in the first place as it makes it really distressed.
When it has gone clear you can add the foil to the edge.
Then Sheena's Grunge Band stamps came into play. I do love these, excellent for creating so many effects. I used these on the dove peace card, the Wishing you a Merry Christmas scroll card and the Noel card. I randomly stamped them with Memento Gold Galaxy ink. This gave me a guide to work from for the foil.
After it had dried I applied the gold foil which turned the circles into rays of light. I also applied the liquid paste to the stars so I could foil those too.
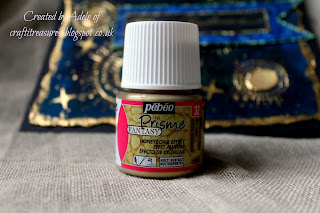
Then to mix it up a bit, I felt like adding a extra technique. I thought these Prisme paints were fantastic when I saw Sheena's and Donna's samples on the mixed media shows. As long as you make a deep enough reservoir with the relief paste and don't put too much of the Prisme inside it, it will be fine. It does take quite a while to properly dry though but worth it.
Then I decided to create a sentiment banner using the lighter blue from the Landscape Aquatints and the sponging method again. On this I also added the gold Aquatint from the Essentials collection. A little tip for this is to add some water to your glass matt and then a drop of the metallic to it. This waters it down, so that you get a hint of sparkle rather than full on gold or silver. Also the extra effect of this, is that the water you have soaked up also pulls some of the colour out of the background, so you get a lovely pattern with lighter areas too. :)
This is the finished card. The sentiment is from Sheena's new Victorian A Little bit Festive collection, Christmas Notes. I thought it fitted in well with the design of this card. Gold Stickles were added to the edge of the sentiment.
I wanted you to see that you don't just have to use "Christmas" stamps and images to get a nice seasonal card, You can also create something contemporary using Sheena's other stamps. :) So don't be afraid to experiment and have a play!
Before I finish this post I will add the photos I did take whilst making the Silver Bells card. I have photos of the background! Two at least.. lol. This was created with the blue Aquatints. I then dropped water on it with the pipette and added splashes of the Silver Aquatints, followed by the snowflake stamp from the set and heat embossed them with white puff powder.
I hope you have enjoyed these techniques. I will be back next week with a new inspirational project from Sheena's range, following on from my fellow Teamies creations, so watch this space! :)
Adele
x


Thanks Adele. It's great to see how you create your cards. I feel like I've just had a master class
ReplyDeleteThank you Sheila :) x
DeleteThanks Adele. It's great to see how you create your cards. I feel like I've just had a master class
ReplyDeleteFabulous! Such great cards. I don't watch Hochanda so it's really nice to see your makes on here :-) xx Jayne xx
ReplyDeleteThank you Jayne. That means a lot. :) xxxx
Delete