I hope you are all well. I've been very busy with lots of crafty things but...better late than never, here are some of the techniques I used on Sheena's Day of the Dead folders as promised. I so loved playing with these! Are you sitting comfortably? You may want to make a cuppa first! lol... Ready? Let the marathon begin...
So where to start... lets start with the scenery cards.. so for these I used the Castle on the Water and the Storm Brewing folder and embossed them through the machine on white card. Pebeo drawing gum was then painted on to the raised up images.

I'll follow through one at a time now. The landscape Aquatints were sponged on the surface, dark blue, green and a hint of silver, watered down from the essentials set.

Then, after rubbing off the drawing gum, I painted clean water on to the clouds and then added bits of the blue and black AT's and as you can see it bled to make patterns, this helps capture the fluffiness of the clouds if you know what I mean.

Then you end up with this. Pebeo Mixtion Relief was then added to the lightening forks, followed by silver foil.

The next step was to cut out some black card to create the diorama. This measured just a few millimetres more than the folder when the image is trimmed to the edge. Either side you then score two, two centimetre wide panels, these will become the edges to glue together.

Attach your image to the back of this panel.

Another panel was cut out for the front, the same size with a window in it. Sheena's Old Tree die was then taken and die cut in black card twice. I applied silver gilding wax to one of them and gold to the other.

So after all of the bits were brought together I ended up with this.

Now... back to the spooky Castle on the water... I used the Landscape AT's again. I wanted to create and eerie look to the sky so blended the earthy yellow tone into the blue, adding a hint of watered down gold to the ochre colour and watered down silver to the blue.

After rubbing off the drawing gum again, the black AT's were then used to paint the castle, rocks and bridge. The blue was painted on the water with highlights of silver as if it was catching the light of the moon to be added later. The light in the windows was added by Aquablend pencils.
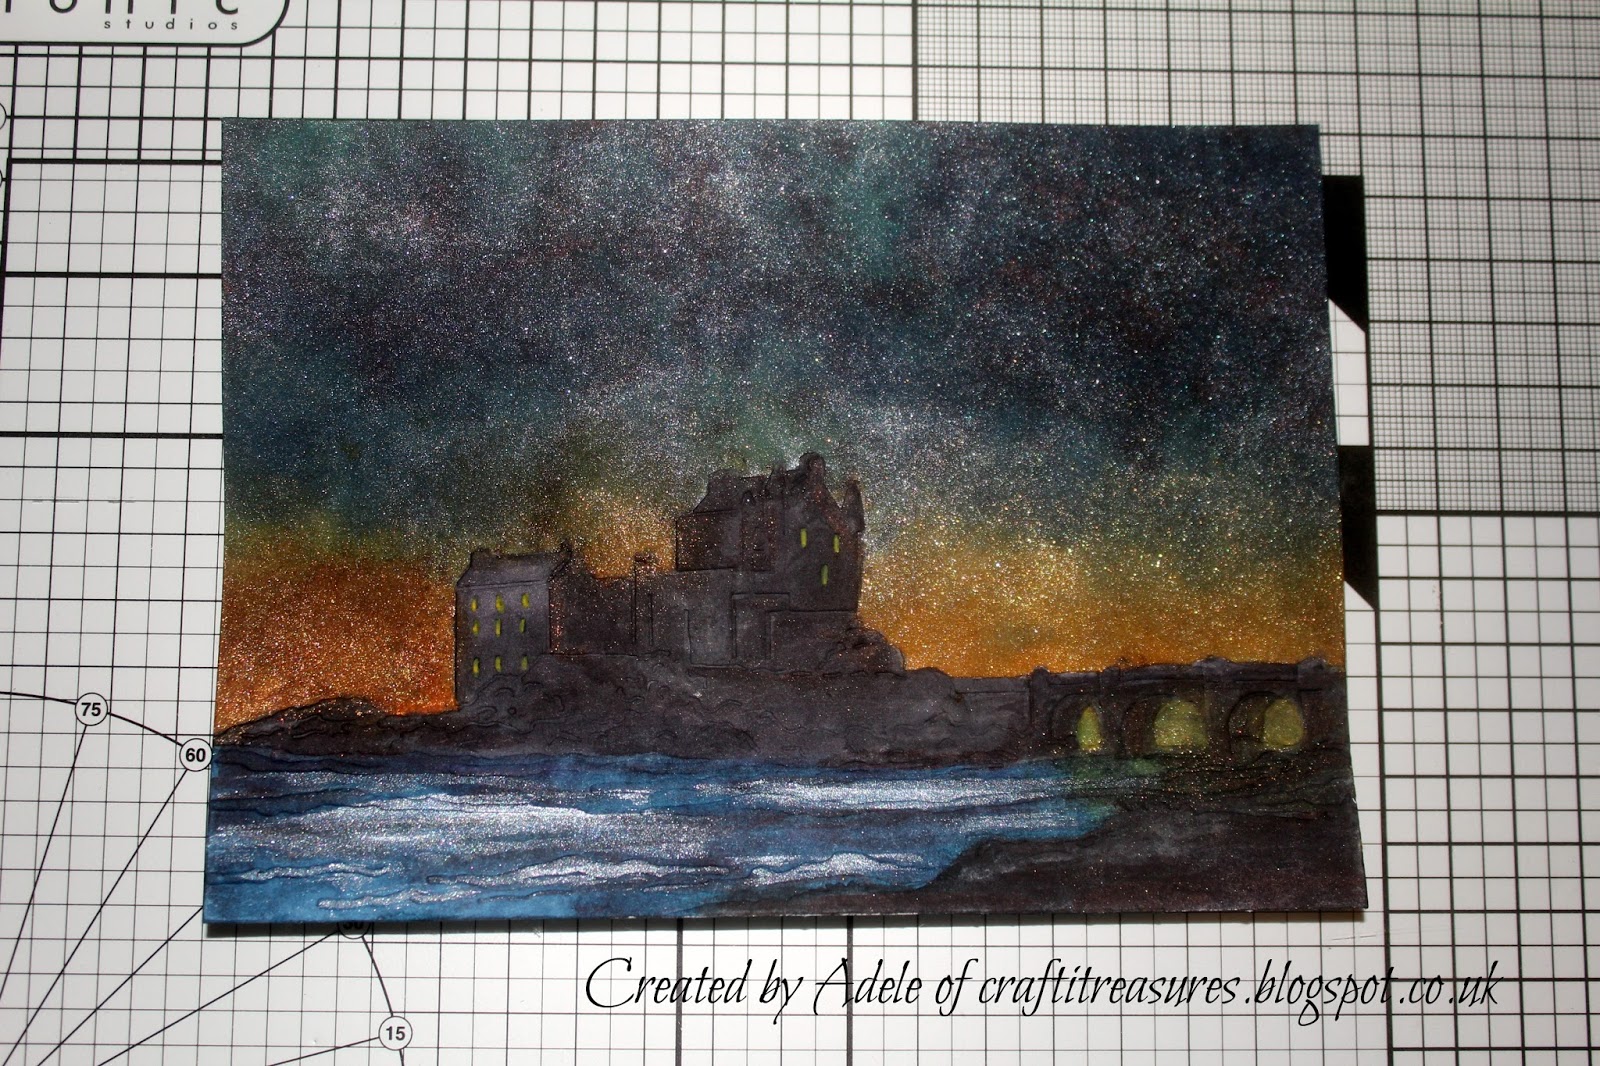
A small die cut circle was drawn around and I used a white Pebeo marker to create the moon, this was followed up by adding a shimmery glow around it with the silver AT's. Shooting stars were also applied with Mixiton Relief and silver foil. As you can see this was then attached to a panel for the diorama again.

I wanted the sky to blend across the diorama so applied the same techniques to the front window panel.

The inside of the front panels were strengthened with spare strips of black card, and the excess cut away, this would make a sturdier frame when the tree was attached. So, as you can also see, the very end 2cm strips were glued together to build the diorama.

Then this is the end result. :)

Moving along to the skull card.. for this card I combined Sheena's skull die, the top hat from the Day of the Dead Union of Souls stamp set and Sara Davies Just for Men Cogs and dies with the skullduggery embossing folder.

I also used the Grunge Band stamp set with Gold Memento ink. The folder was embossed with kraft card and gilding wax was used on it. Gold foil was applied around the edge.

Decided to add a bit of foil to the background too so it would tie together nicely with the rest of the card, but, in a subtle way so it would not be too much. I flicked spots of the liquid Pebeo foil glue on to the black card.

When it's dry you end up with this. The really good thing about this technique is you can use up all those foil sheets you don't think are of any use anymore because they have been heavily used previously, these are perfect for this as it only needs tiny spots. So don't throw them away just yet! :)

I built up the matts and layers. The gold one is kraft card with gilding wax applied round the edge.

I took some wooden swirls. coloured them with the gold Pebeo pen and then added Mixition Relief to them and patted it down with my finger and applied gold foil when dry.

I then brought all the bits together and created the card. Tea Dye and Walnut Stain Distress Ink was used on the skull. The cogs were coloured with gold and copper Pebeo pens or embossing powder as I wanted different textures and shades. Skull was shaped and curved to add dimension. It was glued at the edges but had foam tape in the middle.

And now for the Rambling Rose folder with the Forever yours stamp.. embossed on to black card, I then used gilding wax and the gold Pebeo pen to highlight the rose.

Colour was added to the flower with a Aquablend pencil. Don't worry if you get a bit of red on the gold you can touch up with the gold pen again.

I took a panel of white card and stamped it with the rose from the Forever Yours set.

Painted the roses with drawing gum to protect them.

I took the pale yellow and orange from the pastel AT set because the other yellows would have been too harsh in tone but I wanted a richer colour base for when I applied the Distress Ink. I sponged it on and the added over the top watered down gold.

Darkened with Distress Inks, Tea Dye and Walnut Stain.

Rubbed away the drawing gum.

Added colour with Aquablend pencils.

Mix colour with water.

I then added shadows around the roses to make them seem more real, blended out with water.

I took a panel of black card to matt and layer with and applied Mixition relief, adding texture with my finger.

Added foil when dry.

Stamped and cut out the lady from the stamp set, along with other sections I wanted to decoupage. She was coloured with the Aquablend pencils.

Sentiments were then added to finish the card.

And that was the cards (as seen on screen ;) finished! :) Are you still with me? lol.. I might even be back another day with the Terminator card! (See what I did there?) As that was an extra that was not on the shows but I couldn't stop playing with these lovely folders!
I hope you have enjoyed this..coming up soon is another inspirational Sheena post so watch out for that.
T.T.F.N peeps! :)
Adele
x
No comments:
Post a Comment