I hope you are all well out there! What strange weather it has been here lately! Can't seem to make it's mind up! Looks like sunnier days are on the way again though, so, something to look forward too. As I type I'm actually getting repeatedly pawed by a cat who thinks it's rude that I'm typing whilst she is sat on my knee. Obviously, it hasn't registered that I started doing this before she got on my lap...lol..
So, recently you saw the launch of Sheena's new collection, Alchemy! I love these stamps and dies so much.... oh that's it.. cat is gone... got the hump... opps..lol.. 😜I'll make it up to her later 💗 (Oooh, look, I can now do emojis- life is complete 😄)
DI = Distress Ink
PP = Pebeo paint.
Anyhew, this is how I made some of the cards. This was my Alchemist's Dream card.

And to create the back ground for this, I took the Create a Flower, Dissolving Planets stencil and put it through my gemini machine to emboss a square of white card. I coloured it with DI and then re-positioned the stencil back over the top, so I could then go over the raised bits with darker DI ink. I wanted it to look like a chemical soup and thought this would be perfect.

Next I sponged Pebeo liquid foil glue around the edges, (kitchen sponge with holes torn out for texture). When dry I applied gold foil. I wanted it to look like gold bubbling around the edge. I then stamped rings in the circles with a gold Memento ink., this was done with the Grunge band stamps.

I don't have any photos of the bottles but... this is what I did..
Die cut and stamped them. Painted them with watered down Pebeo paint. You can then stamp back over with Stazon carefully, if you feel the image has faded too much underneath. I added white paint highlights to the bottles for shine. Then to emboss!.. I did two layers of clear, one third layer of clear with coloured glitter sprinkled into it, to match the painted colour of each bottle and then another fourth layer over the top. I just discovered this from playing and love the effect. The glitter will hover suspended and looks like it is really floating in the bottle and four layers should give you a smooth glass finish. You can't do one or two, it will look like orange peel instead.
Crafty Tip: Curve your bottles slightly before you clear emboss else they will crack, unless you want that, if not you will have to add another layer to smooth them again.
Now to the All Seeing Eye..

This was one of the cards I created to represent the spiritual side of Alchemy and if you have Sheena's angel wing stamp set, it works great with this collection. The red background is DI with faux bleaching.

I have a Verity Rose embossing folder from Crafter's Companion that was perfect to combine with this... heavenly rays! I embossed a piece of white card, painted it with PP, then sponged white pearl PP on to it for clouds.

Kept sponging until they became more subtle. I then coloured the rays with gold and gold glitter PP.

Stamped the eye and used Aquablend pencils to colour it, also went over with watered down gold pearl PP, to make it shimmer. Added foil highlights around the edge of the triangle and to the rays. The wings were heat embossed with WOW white powder puff. Love this, really gives you texture.

Stamped the chosen sentiment on to some card..

Shaped it into a scroll by repeatedly sweeping the thin end of a paint brush underneath and curving it. Then folded back on itself.
This is the elemental cross, created by using the eye as a template. I stamped out the eye and then used it to make these triangles.

Coloured them with DI and then stamped the elements. The disc was coloured the same way as the eye above and stamped with gold embossing powder.

The background was created by splashing PP on to a square of white card (see my Temptingly Tropical tutorial for how to do this.) Sentiments were stamped. Gold foil was applied around the edge as on the Alchemists Dream card above.

Crafty tip, as a guide I glued a circle to the background, measured and placed in the middle. then I knew I could build my cross from this and it would be even. The disc then went over the top.

Palmistry hand..

Took some paper, drew a square on it and roughly tore along the line. Screwed it up to crumple it.

Coloured with DI and then layered on to a Kraft card and gilding wax background. I wanted it to look like lined hands. splashed it with liquid foil glue, added gold foil when dry.

Used Sheena's recently launched Word stamps to create a background, thought the Life word would be perfect... life line... stamped it with Versa Mark as it resists the DI, leaving a ghostly image.

Magnifying glass...

I cut out the magnifying glass in black card and also in white. The frame in black was then embossed with gold, and I applied gilding wax and polished. I decided it would be a good idea to stamp the words 'Discover secrets' into the glass section. I did faux bleaching on it to match the background and then clear embossed it to look like glass. This is an easy way of making it look realistic.

Once on the card I also added foil highlights for extra shine. Took a picture whilst the glue was still wet, so you could see where it was applied.

The Star of David... the balance achieved..

I used the triangle template created from the All Seeing Eye again to make the Star of David. I also used the hexagonal die that came with a previous Crafter's Inspiration magazine. It fit the eye perfectly (largest die), I could then position it correctly to form six even points and trim the excess.
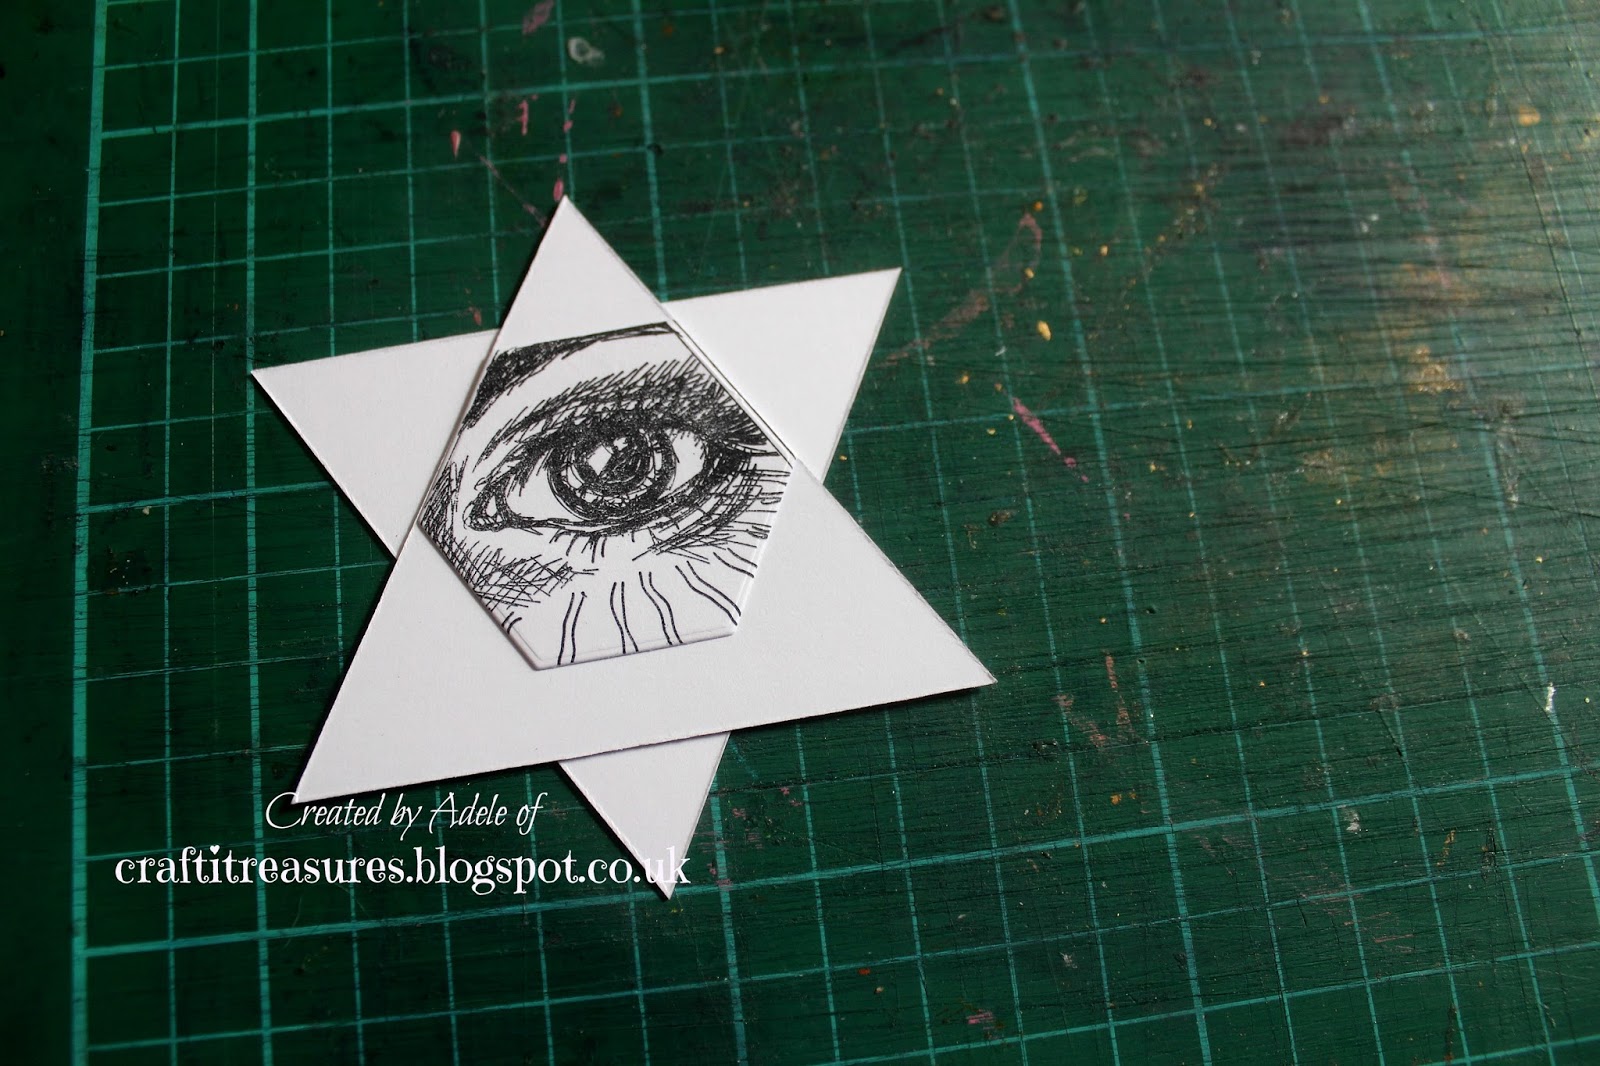
So then I had this...

The knowledge is to be found in books....

For this background I tore a rough edge round a square of white Sheena card and then used DI to colour. I decided to use a variety of words from the collection, to signify that the knowledge was coming to life. They were stamped with different shades of Memento ink. The top point of the eye was measured to the centre and the eye was stamped first, this meant I knew where the words would fit.

Crafty tip: Rock-a-blocks are amazing! If you haven't got them yet, get them, you need them in your life! I wouldn't be without mine. I love them and one of the great things about them is the guidelines on them for straight stamping... but what I also do, with something like this is have a glass measuring/cutting mat underneath. I put a small piece of doubled side tape on the mat in the middle to anchor the panel I want to work on. This also works very well for stamping sentiments on all four corners, as in the Star of David card above. It means you can line it up, stamp the words, carefully twizzle it (because you are not pressing down on the double sided tape, it's just lightly tacking it down) and line up the next corner in the same squared off spot. It means you can use your Rock-a-block guidelines, in combination with the lines on the mat, so you know that the distant on each corner will be the same. Hope that makes sense!! And as you will understand it was a useful method for creating the background above, because it meant they were on the same line either side and thus level.
Hope you've enjoyed this inside knowledge! See what I did there! 😉I shall blog in another post about the mixed media projects... I'm off now to cuddle a cat... 😍 because I'm such a meanie...lol...
T.T.F. N
Adele
x
Thanks Adele. Your blog always gives such great tips. Your cards are fantastic. Hope the cat forgave you. X love Rosemarie
ReplyDeleteThank you Rosemarie, glad you enjoy it :D She did..lol.. <3 x
Delete