Sunday, 30 April 2017

Alchemy with Sheena Douglass

Hello lovely peeps!

I hope you are all well! I've been so busy lately but with very good reason, been creating lots of lovely new things with Sheena's amazing new collection! I will catch up with the promised tutorials for the previous collections soon.

So, Alchemy is here!!! A new collection of Perfect Partners stamps and dies. The Inkoids have been creating magic and experimenting with these. We know you will love these too!

I've created cards and various home decor pieces. It's a fascinating subject and you get to play with lots of wonderful things. They also work perfectly with some of Sheena's other stamps and dies. How fab is that? Mix it up!

So here is what I have created. Cards...

I called this one 'Alchemist's Dream'.. and what do they dream of? Well potions of course and the creation of gold!! I also used the Dissolving Planets stencil from the Create a Flower collection as it made a perfect background for chemical soup.


We often think of alchemy as the desire to turn base metal into gold but it is also a metaphor for the spiritual growth of the soul, its transmutation in gold, a state of perfection. Sheena's angel wings work brilliantly with this to represent the ascension of the soul. The golden rays from the sun were created using a Crafter's Companion embossing folder (Verity Rose), painted with Pebeo paints. 


This just had to be done. The Star of David symbolises the balance of knowledge, when everything comes together perfectly. I was able to design this using the pyramid as a template...will show you how in another post. 


I gave an extra nod to Leonardo da Vinci by using the ink splodge stamps from the Christmas Notes stamp set. The centre circle of the magnifying glass was stamped with the words, thought these sentiments would work well this way and then it was clear embossed with powder to make it look like glass. 


For this card I wanted the words to come to life out of the book, so I had them floating in the ethers, and I combined the lady with the eye to suggest that she is growing and gaining knowledge from the books she is reading.


With this one I decided to create an elemental cross with the disc in the centre. The background was created with Pebeo paints and I sponged on Gilding paste around the edge and applied gold foil after it was dry. 


Love this palmistry hand. I decided for the background to crumple some paper, so it would look like the creases and lines in a hand


These scales are brilliant! I cut them out with black card, gold embossed and then applied gilding wax with foil highlights. This makes them look like metal. 


I thought the Professor would be perfect on a notebook, again used the Verity Rose embossing folder as a background for Sheena's fantastic stamp and painted in with Pebeo.


As soon as I saw the All Seeing Eye, I knew I had to create an actual pyramid and make it gold of course!! Loved playing with this.


I was lucky enough to find this frame for sale in a local shop and I just knew, as soon as I saw it, it would be perfect for a project with the Alchemy collection. The Eye would look great and compliment this shape, the eye watching over it all.


And so... to the canvas. This one is bigger than any previous canvas I've made but it needed to be to do what I wanted and get all the bits in. I really wanted to set a scene with this and show how everything works well together and also with other Sheena collections. As you can see, I combined it with some elements of Time Traveller and Day of the Dead. Alchemy is very much about symbolism, so I wanted to convey that.


This is the meaning behind my thinking... prepare to be scared!!! lol

Overall, I wanted the composition to tell you many things. The plaster is coming off the walls, now exposing most of the brick. The cellar window above must have cracked and the ivy is now creeping through and down the walls into the lab. On one level, this indicates how obsessed the Alchemist is with his experiments that the everyday things around him are not taken care of but the ivy also represents something else, which I will explain later. 

The All Seeing Eye is watching over everything.

The keys represent the keys to knowledge, some are hung up high on the wall, to signify the alchemists has gained some higher knowledge. If you look to the lower right you will also see another key partially hidden. This represents something he is still studying and has to gain knowledge of.

The hour glass is the time it takes to learn.

The palm signifies that his fate is in his hands.

I used the skull as a symbol for the search for immortality, linked to the Philosopher's Stone, which is used to create gold and the elixir of life.

Ivy represents determination, survival and the spiritual struggle of the soul. It has the ability to recover after set backs, proving it's strength. Everything an alchemist would need! 

The symbols on the bottles are chemical. The green bottle in the centre has the symbol of verdigris, had to be done! 

I also added crystals and scattered them about, here you can see Emerald, Carnelian, Amethyst and Lapis with Pyrite. 

Old images of Alchemical lists were added to the canvas. Be careful not to use modern images. These are very old, from the 1600 and 1700's so well out of copy right and won't get you in trouble, they are free to use and in the public domain. These added to the feeling of him collecting information and knowledge.  

He's been able to create a tincture of gold but not actual gold yet! His experiments continue!


So, that is a peek inside my head! How scary was that?? lol... Don't stay in there too long, you will go crafting crazy!!

I will be back with another post about how I made these projects in the not too distant future! So stay tuned! :) 

T.T.F.N lovely peeps!

Adele
xx


Friday, 28 April 2017

Temptingly Tropical Tutorials

Hello lovely crafters!

So, here I am finally updating this page with the tutorial for the gorgeous Temptingly Tropical stamps from Sheena. Better late than never right?... will try not to waffle too much, got a lot of blogging to catch up on! lol... I say that now..... apologies if I fail!... doing it already....sigh, there's no hope!!

Before I begin, for those who may not know DI = Distress ink and SC= Sheena Card.

The hummingbird card, I love these little critters!


So I stamped the hummingbird several times so I could decoupage...


Took an 8" card and mounted a layer of Kraft card on to it, the edges coloured with gilding wax, two shades mixed to create depth. The next panel to layer was this, used the leaf stencils from the Create a Flower collection. Lighter DI underneath, darker over the top with the patterned leaf.


Smaller panel for the centre, stenciled with smaller leaves in the light DI. There was also blue DI for the sky but it doesn't show in photos. 


Then I played around with the arrangement, decided I liked it off set to add more interest. Went on to colour hibiscus flowers with Aquablend pencils.


The vase was created by up-cycling a mash potato container. (For those occasions I don't always have time to cook... don't tell anyone..lol..) I cut some card to fit around it, applied texture paste through the stencil for the leaves and also added texture gel. Stamped and painted images and decorated.  No photos though as camera died (rude.) 


Flamingo card...


Same method as above for the hummingbird card to create the background. Then I multi stamped the flamingos...I do like decoupage to add dimension. 


I glued the head and neck flat because they needed to be close and put a spot of 3D glue underneath the body to raise it up.


The water was created by drawing a horizon line, applying DI and then watering down some of the blue pebeo paints, mixed with silver glitter paint, and adding over the top in brush strokes. You will find it bleeds into the card but this gives a nice effect with the water. I also added some dark streaks with a darker blue DI. There are hints of pink in the water too for reflection. 

Large Kingfisher..


I created a background using the Barking Mad stencil (Create a Flower) as it works well for a watery feel with DI's. Sprinkle clear sparkle pen over this too. 


Stamped a mountain image by Sheena to build a scene. I like creating cards which look like a photograph, that a moment in time that has been captured. I added more colour to the hills after the photo was taken. Water was created the same way as it was for the flamingo card and I added shimmer with a clear sparkle pen.


Kingfisher was stamped twice, so I could decoupage.  I coloured him with Aquablend pencils but I wanted to have some feather texture to the bird too, so I added some small strokes with the Pebeo paints over the top, which you can just see.


I then added leaves around the scene which I had stenciled and then cut out. Applied 3D glue underneath.


Kingfisher in flight...

I love this image and wanted to keep in cleaner and more simple, so the focus is totally on the bird, that one moment.


For the background I brushed water over a piece of Sheena card and then, with a brush dropped watered down Pebeo paint onto the surface. I then sponged watered down silver pearl and silver glitter paint too, around the edge.


I then stamped and cut out the kingfisher twice, so I could decoupage the wing to add depth.


Peacock cards... 


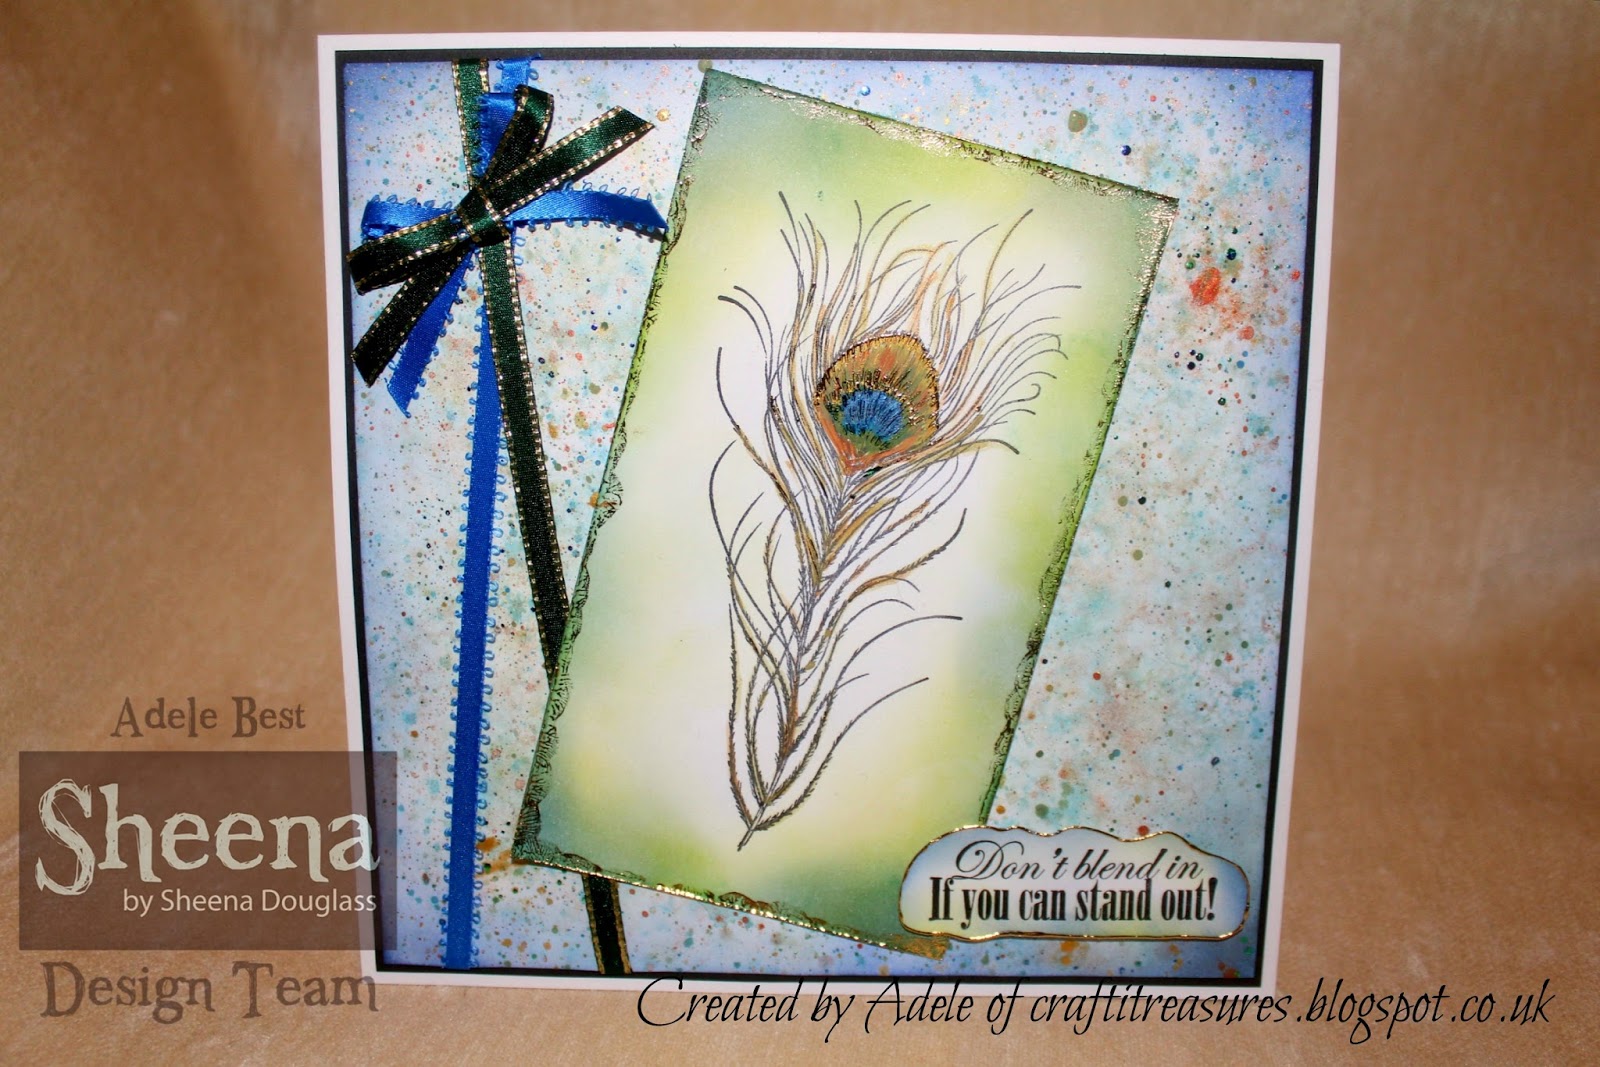
The feather card background was created by wetting a piece of SC, misting it is a good way. I then dropped watered down Pebeo paints on to it from a fine brush. I chose the colours that appear in a peacock feather. 


I then went around the edges with blue DI ink. 


I then stamped the feather and peacock on to two pieces of SC. I took the photo without flash so you could see where I applied foil highlights.  I did this by brushing on the Pebeo mixition relief glue. They were coloured with Aquablend pencils.


I then drew a small border in pencil around the edge so I could have a guide to tear it to.


This background started off as the same as above, I just went a bit further with it and also sponged on watered down Pebeo. added more water and paint droplets, and then sprinkled salt on to it and left it to dry. When it was dry I dropped Pebeo liquid gilding paste on to it with a brush and then applied green, gold and blue foil when it was dry, again all the peacock colours.


Crafty Tip: When you are doing this method, make sure the card that you have cut is absolutely perfect and square, same size. Be careful not to over wet it as it will warp and be more difficult to mount on your card. Do not use heat as it will make this worse, leave it to dry and do something else. I found this out myself in the past from playing.

Then I began to arrange the card. The feathers are dies from the Downton Abbey collection and I thought they went well with it. They were painted and then pressed against a Versa Mark pad and then sprinkled with blue, green and gold embossing powder. A flower was then added, made form the Create a Flower centres. 


Something I can now tell you, only updating this page now.... I was very honoured to be asked to make another copy of my peacock card for Crafts Beautiful magazine, the current June issue. It was super exciting to see it in print the other day. :D I feel very lucky. 

So I hope you have enjoyed this tutorial,... hands up... I did waffle a teeny bit didn't I?! Oh well...epic fail...lol.. can't be good at everything... I'll update other tutorials as soon as I can. 

Ciao for now lovely peeps!

Adele
xx


Create a Flower Tutorials: Cards

Hello crafters!

I hope you are well out there! So, I am finally updating this page with how I made the Create a Flower cards. I always get there in the end, bare with ;) I haven't got any photos, it must have been when the camera died again..but anyhew... will talk you through it.

DI= Distress Ink
PP - Pebeo paint.


This was created using the wall stencil for the background with Distress Ink. I then sponged the leaf stencil over the top with Pebeo paint.  Petals were also coloured with PP.  When I saw the fancy petals, I thought they would make a lovely butterfly! This was coloured with Colorista pencils. (Only got one set yet, hope to get the rest! I love them, honestly try them.) The centre is from Sheena's butterfly die. I also added the What a Mesh die, used PP paint (black pearl) on it and texture gel and then went over it with gilding wax.


For this one, I cut some black card, stamped one of texture stamps on to it in seemingly random segments and heat embossed with gold.  With the next layer I took some white card, used DI through the Slightly Barbed stencil and then distressed the edges and tore into it, so that the stamped images would peek through. Leaves were sponged over the top with PP. The flower itself was cut with canvas paper, you can buy these canvas pads on the high street. It was coloured with PP and gilding wax was added.  I wanted a bit of a grungy look with this one. Added the "boingers" as Sheena calls them.

I loved making all my cards but this may be my favourite. I wanted it to look really industrial, like it was created with recycled metals and show how this collection would also work with the Time Traveller.  So, I cut out and stamped the petals with Versa Mark on to black card, embossed with silver powder and then I thought...ooh...what will happen if I do this?...so I took out my large chunky silver Pebeo metallic pen and swept it over the petals.  Ooooh I like it!! It makes the embossing even more shiny, shiny!! I then did streaks of the gold Pebeo pen out from the centre of the petals. Don't use your gold directly on top of the silver, as you will contaminate your pen. It is best to squeeze some out on to your glass mat and use an old fine brush, one you are not so bothered about, if you don't have anything to clean it with afterwards. It gives you a nice effect though. 


The background was done by taking the Barking Mad stencil and pushing down a Versa Mark pad over the top through the stencil. Once I removed it, I then sprinkled, gold and copper embossing powder over the top and heated, I wanted a multi shaded metallic appearance.  DI's were then used to colour the background. I took some card and cut the Cool Corrosion die into it. I painted it with black pearl PP again and then sponged gold PP over the top to add more texture and interest. Sensational centres and boingers were added. In fact, I used the large boinger (spiral) to create the centre. It takes a bit of manipulating but you can do it and then glue it to a small circle die cut. I added texture gel around the edge and painted it gold. Don't forget you can also use the negatives from the die cuts to decorate other parts of your project, so don't throw them away! 


With every card I wanted to do something completely different, to show how versatile this range can be and especially for those who may not usually like floral dies and stamps. There is something in this collection suitable for everyone, so you can go from pretty, pretty to grungy and industrial, so much scope! So this was my pretty bloom card. I wanted it to look like it was growing up and out of the card, like it could be picked. So the petals were cut with copier paper. Painted with PP and the glossy transfer gel to give them a shine. On the centres I applied gilding wax and then in the very centre I put some texture gel and when it was dry painted in with gold PP. I added gold foil spots, spanning out from the middle. 

It's been lovely to see that so many people are still playing with this Create a Flower collection, and I'm not surprised as with all of Sheena's designs, the possibilities are endless! That's why we love our Sheena, she's so amazingly clever. :D 

I will be back in the not too distant future with more posts.

crafty hugs you lovely peeps.

Adele
x


Sunday, 19 March 2017

Create a Flower Tutorials - Part 2: Mixed media

Hello lovely crafters,

I hope you are all well. As promised I said I would be back with how I made my other Create a flower samples, so here we go... I'll try not to waffle too much ( that would be a first! lol.) There are lots of photos.


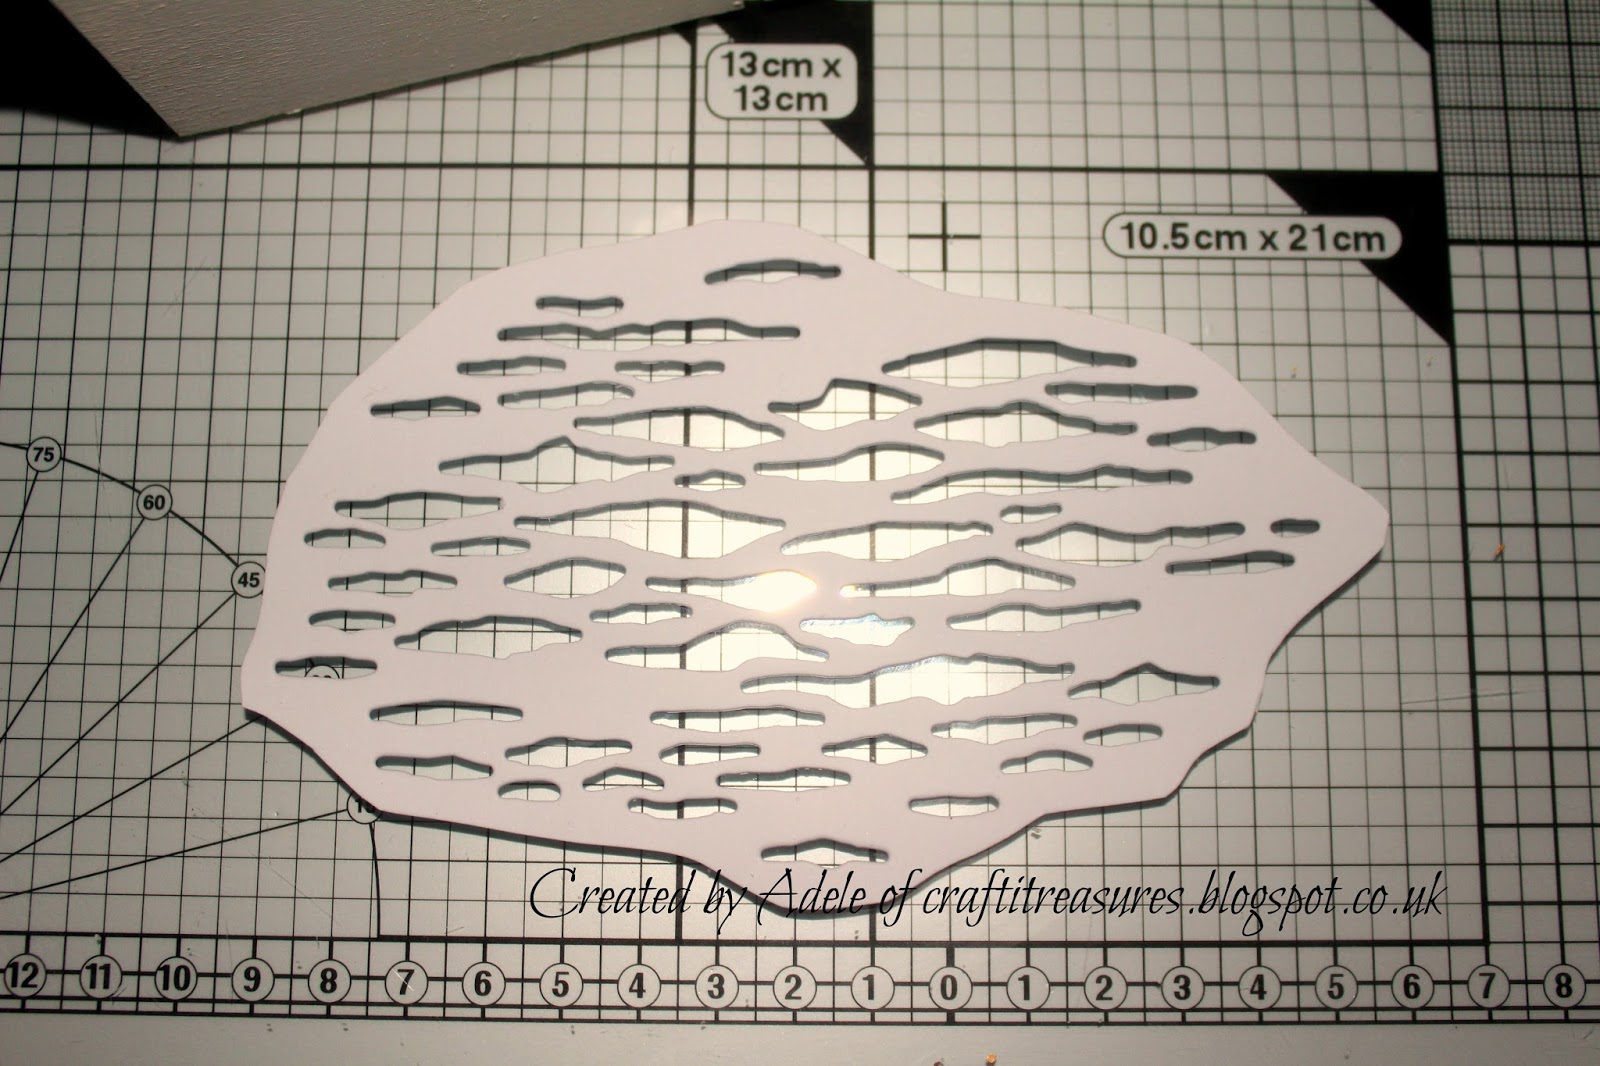
So this was the Water Lilly box I created. First I took the Cool Corrosion die and cut it out to use as a stencil. So you can also use it this way. :)  As soon as I saw it, it reminded me of waves and ripples in water. You will have to throw it after afterwards but it's great to add pattern. 


Cut out medium and small petals. Stamped and embossed with clear powder. Painted with white and lilac pearl Pebeo paints. The pink shade on the edge, highlighted with gold gilding wax.


Took one of the circles (a cut out from the middle of the Time Traveller goggles) I'd saved to use as a base and began layering the petals into the centre.


I also used the small Sheena petals that came with the Crafter's Inspiration magazine as I realized I needed some smaller ones too. It's great to have these as well. And you don't have to use the full stamp you can also put a pattern on the small ones by just positioning them in the centre. I also added small buds around the box as you can see from a previous post as the sides needed something to complement the top.


Earlier, I applied modelling paste through the die stencil, to all four sides and left it to dry, along with texture paste on the bottom to signify the stoney pond base.  When it was ready, I began to paint my underwater scene with the Pebeo paints. The modelling paste gave the impression of ripples in the water. 


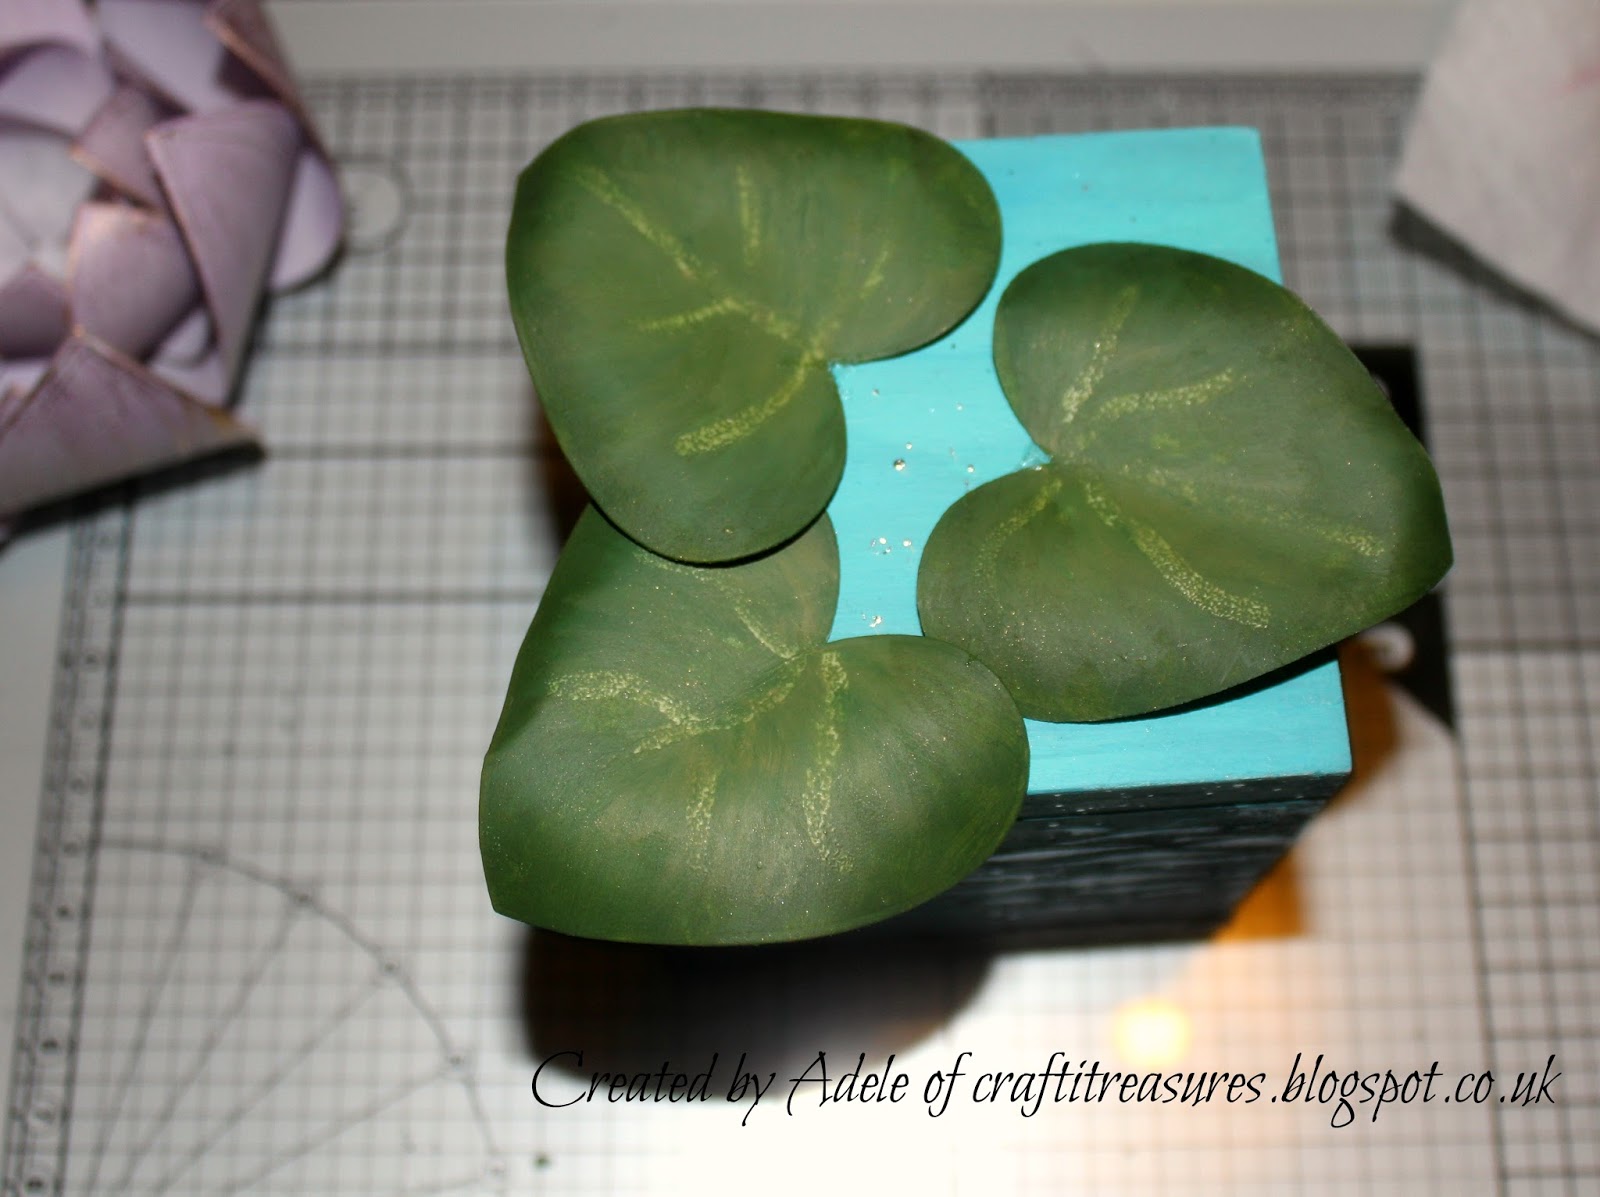
Added some leaves with Sara Davies heart dies as wanted a realistic shape for them.


I had some stamens and rubbed over them with gold gilding wax.


Took one of the Sensational Centres and another goggle circle, covered them with gilding wax and folded the stamens in half, securing them just slightly up from the fold.


Cut out the boingy thing, spiral, manipulated into a cone, sticking it to a goggle circle base again. It was then painted gold.


I fed the stamen stalks through the hole I'd made in the goggle circle. I trimmed the ends shorter after it was glued fast. 


Then glued them into the cone I'd created to make a raised flower centre.


 Don't forget you can also make a full stamen centre with paper and the die centres, multi- layered and scrunched. You could then glue these into a cone. :) For some reason I did not think of this at the time..lol... my brain was obviously full of too many other crafty ideas! But that's why we have a design team, lots of fabulous different ideas from everyone :) 


The flower was added to the top.


But before I did that I flicked droplets of Pebeo foil glue on to the box and added silver highlights when it was dry. I painted the waves with the transfer gel, which can also be used as a varnish to add shine, to enhance them.


Canvas...

For this I added some canvas paper to a canvas as I wanted a shabby chic look and to add more interest and texture. It's hard to tear this because of the weave, so you have to do it with scissors, just don't do it straight and it will look more natural. :)


The Create a Flower stencils were then used with modelling paste to add pattern and texture. I applied texture paste into the torn gaps as I wanted it to look like the earth, that gives life to flowers, peaking through. Modelling paste was also added around the edges.


I'd added some paper cogs to the background, for more interest too, and painted these gold and also used the pebeo paints to colour the foliage.


I began to arrange my flowers and other bits. I had an idea of where I wanted them but it is always good to have a play before you add glue in case you wish to change something, or come up with another idea. I ran gilding wax over the edges of the canvas and the 'soil.'


Various different materials were used, faux leather, a tapestry style fabric, paper and more..


Hope you have enjoyed this post. Back soon with more tutorials. :)

T.T.F.N peeps

Adele
x