Thursday, 13 September 2018

Deck the Halls with Sheena Douglass

Greetings crafters!

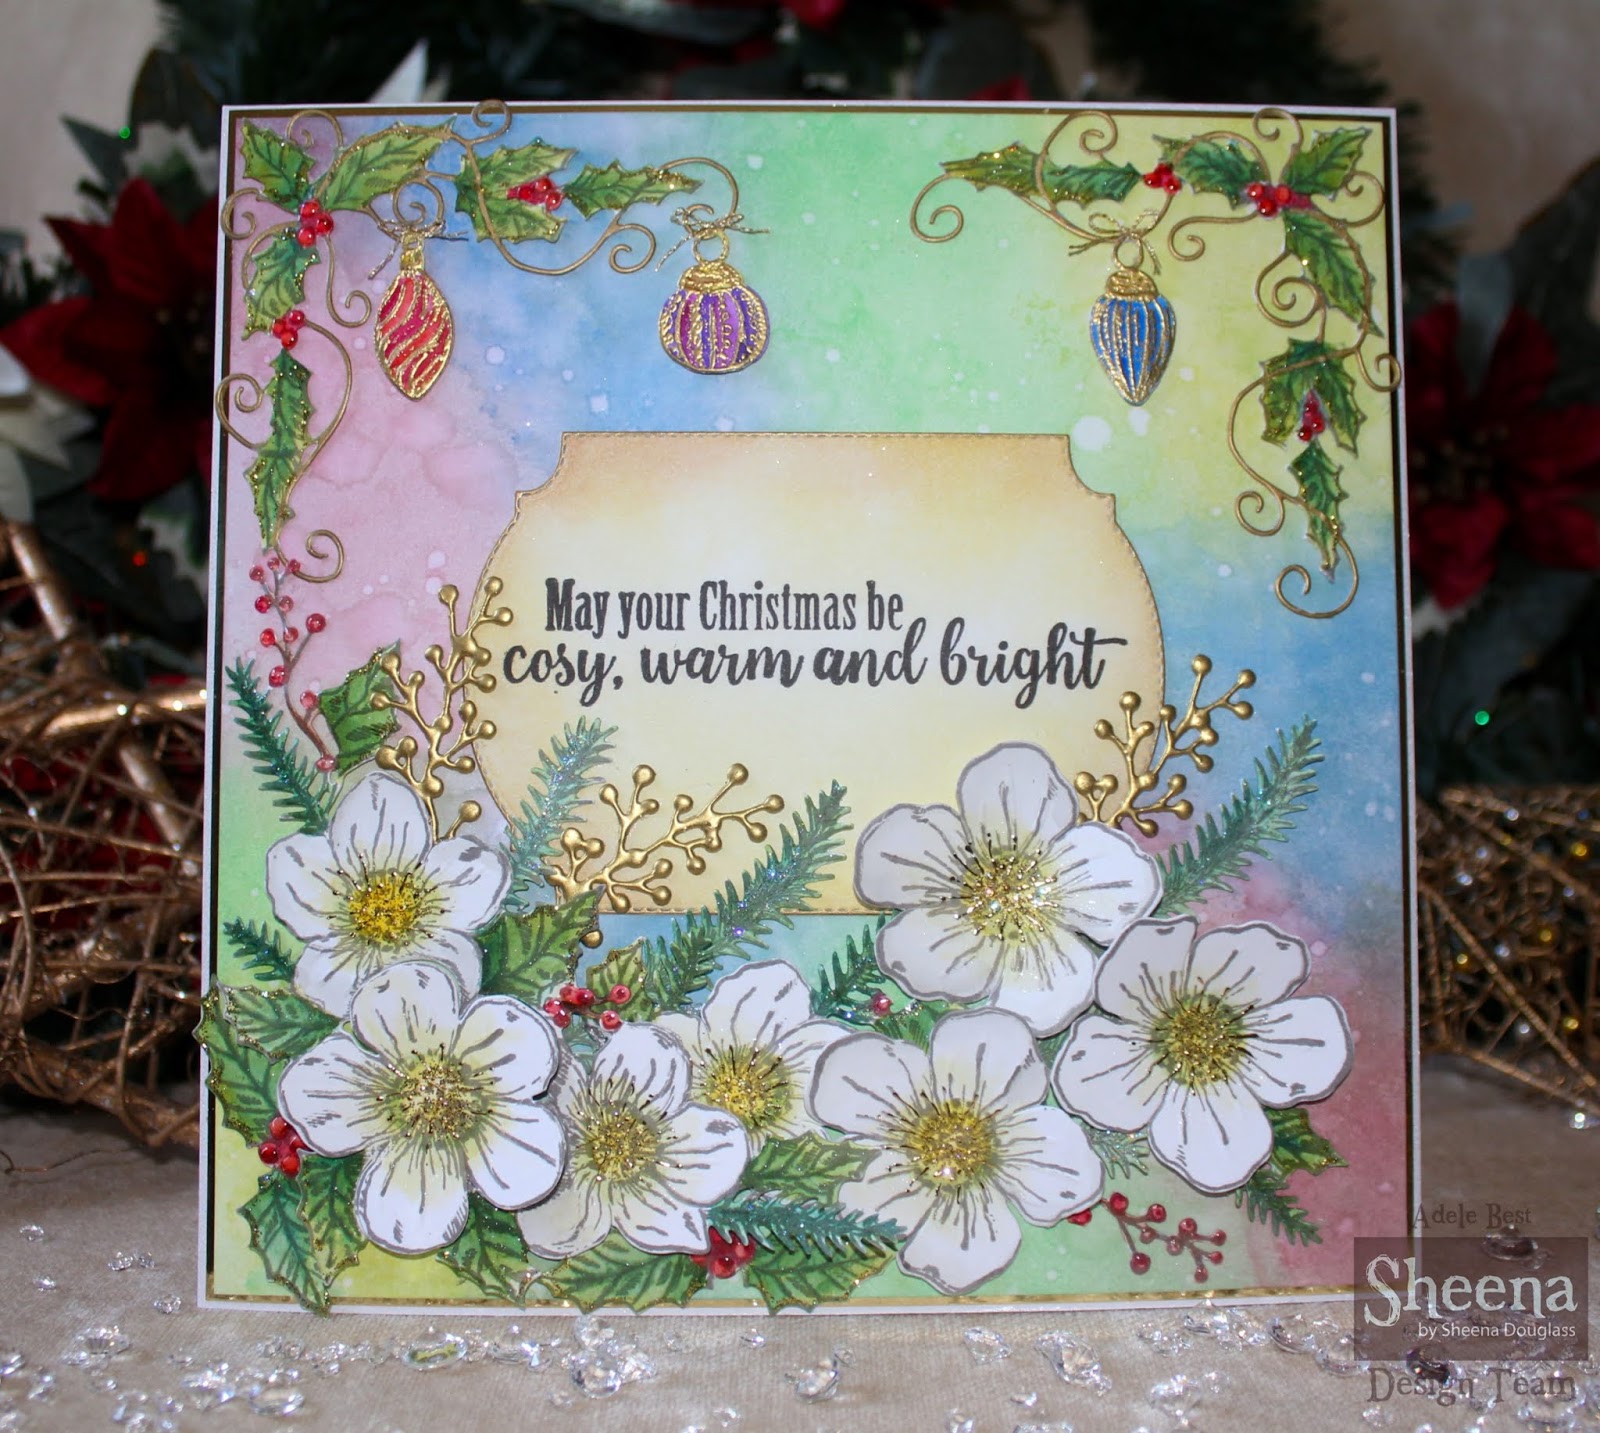
In July we were still in the festive spirit at Sheena HQ as we launched Deck the Halls! This is a perfect partner collection, so the dies and stamps match exactly. I adore this collection! 

As you can see, there are beautiful blooms, ornate corners and tiny baubles. I decided to hang them from the fancy corners as they are the perfect size! Along side these stamps and dies are also other foliage, and that is always a good thing, so many uses. 

It wouldn't be Christmas without poinsettias and and Sheena has provided a corner, an edgeable and individual bracts for you to play with. For this card I also wanted to go full on decoration to signify the richness of Christmas and all the trimmings.


I love snowflakes and always like to make seasonal cards with them, so was happy to see another edgeable in the collection, as well as individual snowflakes. I love these sentiments too. 


The Queen of Messy Crafting also brought us a snowflake corner, which I turned into one giant snowflake for this creation. 


I was feeling truly Christmassy after working on this collection and can't wait to make cards for friends and family with this beautiful set of perfect partners. 😊

Back with more crafty goings on later. 

Crafty hugs

Adele
xx


A Little bit Festive Churches with Sheena Douglass

Hello again peeps!

Well, as most of you already know, Christmas starts early for us crafters! June saw the launch of Sheena's new A Little Bit Festive stamps, and for this collection the theme was churches! But just for Christmas!? I hear you cry! No, these Churches are perfect for all year round as you will see, so weddings and Christenings and more... it's all good, lots of possibilites!  😊

I just had to do a diorama as the stamps called out for it. So here is a little village scene and who doesn't love a postbox at Christmas? I also incorporated some older landscape stamps from a previous release of Sheena's.


For this creation I combined the arched pathway with Sheena's brick stencil and ivy die.


I love stained glass and after painting this image, I clear embossed the window panels. the background was designed with another older stamp. 


On a winter's night...


I adore this postbox and felt compelled to go vintage with this one. I made it as if it were a postcard and then used Sheena's Christmas postcard stamp as a background. 


Now for something non Christmas...how about a summer wedding? Again used in conjunction with some previous Sheena stamps.


And here is an uplifting message.... 


I really loved working with these churches and I'm sure you will too, I think they should be a staple of your craft stash! 

T.T.F.N

Adele
xx


Fairies and Unicorns with Donna Ratcliff

Hello out there!

In May Donna invited us back into fairyland! Some of us never left! 😉As well as the wee folk we were also joined by unicorns, so this collection was right on trend! I loved working with these images and I think we all need a little bit of magic and fantasy in our lives don't we.

They came with some wonderful sentiments too.


Night falls for the unicorns...


And the fairies weave their night time magic! 


As the sun rises, another day begins in the fairy realms..


And welcome to the fairy village! I decided I wanted to do a triptych of the new images, as this would allow me to create a real scene, whilst also combining some of the stamps from Donna's first fairy collection, they work so perfectly together. I really wanted to keep this! lol, it took a great deal of time to make and it felt like my baby! 


Close up details of each panel...


After the sun has set once more, the hares play by the light of the moon.


I'm sure it will not be long before I venture back to see what the fairies are up to! You never know where their magic will take you! 

Crafty hugs and fairy wishes!

Adele
xx


Sheena word dies - projects for Die Cutting essentials

Hello fellow crafters!

I thought I would also share a little post with more Sheena word dies. I was very honoured to be asked to create some more projects with them for Die Cutting Essentials - issue 39. I really enjoyed making these and it was super exciting to see them in print. 😄😊


So, what will you do with your word dies? 

Crafty hugs

Adele
xx


Sheena word dies and stamps

Hello lovely peeps!

Back in May Sheena launched a brand new range of word dies, these follow on from her Christmas word dies and can be used for any occasion. They were also accompanied by matching stamps and image dies. You can really create some positive messages with this collection.

This Z fold card was created with sparkle pens and the Crafter's Companion metallic markers.


This is a glycerine and sparkle pen background. The dies also have an outer edge die, so they are great for shadowing and more, I was able to give the clouds a silver lining. 


For this card I just used the stamps from the collection.


A creation with the metallic markers.


A sparkle pen background with metallic markers.


I used Sheena's 60's circles stencil for this background and applied the metallic markers. 


There is no end to what you can do with these! I know you will have fun with them too! 😊

Back soon with more crafty makes.

Adele
xx


Wednesday, 12 September 2018

A Little Bit Sketchy with Sheena Douglass.

Hello again,


Going to take you back in time again for this post...Also back in April, Sheena launched a new set of stamps for her Little Bit Sketchy collection. These brought us landscapes, flowers and insects, so it was back to nature for this release! 

As you can see there are some lovely silhouette stamps too, which are great for fancy backgrounds. For this one I created a sunrise with a dragonfly taking flight. The Aquatint pens work really well with the glycerine technique. 


I had the idea of a dragonfly just landing momentarily, captured in a moment of rest, so made myself a lily pad template. I then painted water droplets and clear embossed them. 


This is a great technique, colour the stamp with the pens and then stamp. You will get different effects depending on how you then treat the image. If you dry it first and then add water to pull the colour out, you will get a sharper line. 


Sweet williams are such pretty flowers! I wanted to keep this a clean and fairly simple card. White patches that stayed clean!! What happened? Not like me at all! Make the most of it! lol  


The blooms were stamped, masked with Pebeo drawing gum and then I added watered down Aquatints to the background, flicked the pens over the surface and also misted it. Once completely dry, I removed the drawing gum and painted the flowers. 


This was created by sponging the ink from the Aquatint pens on to a wet background. I then stamped the dragonflies, faux bleached them, adding different colours back in. I stamped the silhouette thistles and then complemented them with one of Sheena's other thistle stamps. The scene was painted and arranged in the composition. 


I love making salt backrgounds, you never know what you are going to get, but that is the fun of it. 


There are also beautiful sunflowers in this collection, this is a little card made by gold embossing the flower.


I wanted to capture the feeling of a collection of sunflowers growing together, so used the drawing gum to mask for this. 


Sheena's  A Little Bit Sketchy stamps:

Dragonfly
Through the trees,
Beautiful Soul - Sweet william
Overgrown
Sunflower
Wild at Heart

I hope you have enjoyed seeing these makes. 

More coming up soon. 😊

Crafty hugs

Adele
xx


Aquatint pen launch with Sheena Douglass

Hello crafters!

Sorry it has been so long since I posted but we have been super busy at Sheena HQ with lots of lovely new things! So now I shall play catch up with you all. Do you want to make a cuppa first? lol

April saw the release of the much anticipated Aquatint pens! I had a dream of these and then it eventually came true! These are brush pens, exactly the same format as the sparkle pens, just without the glitter. Some of you may be familiar with the original jars of Aquatints, which are fab and I still have these, and use them myself, but in pen form it is more portable. What is not to love?

For this we were asked to play again with Sheena's sketchy trees and flowers. The team used lots of techniques with these amazing pens, in order to show you what great fun you can have with them.

This is a graduated wash with a bit of faux bleaching and decoupaged bluebells.


The background on this card, was created by sponging on watered down Aquatints, and then leaving it to dry. I then applied a second layer using the same method, this gives you a delicate marble effect. 


I chose a more subtle backdrop for these flowers, the colours were sponged on to a wet background, graduated again, and then I misted the surface. I wanted the flowers to be a contrast and really pop off the surface, some were also decoupaged. 


I do love creating northern lights, so this was like going back to an old friend for me, the very first time I made a card with aurora borealis was with Aquatints. 


Why not also experiment with techniques to see what happens? To make this sample, I added water to the centre of the card and then dropped ink into it and let it swirl and run, choosing the colours to signify the changing seasons. Once dry, I then heat embossed the tree in gold over the top and the sentiments.  


I'm so happy to now have Aquatints pens! With them in your craft stash you simply can't go wrong!

Back soon, T.T.F.N 

Adele
xx