So as promised here is an insight into how I made the samples for Sheena's latest Create a Flower collection. 😊
Heart shaped flower box..
For this creation I cut out the petals first in Sheena card and misted them, sponging Pastel pink and lilac Aquatints on to the damp surface. I left them to dry and then sponged neat Aquatints in the same colours over the top. This gives you depth as the first layer sinks in and becomes marbled and more subtle, whilst the second bleeds and adds pattern and texture over the top. I love this effect, (slightly obsessed with it now to tell the truth! Every time you do this is it beautiful and unique. I only discovered it myself by playing.) Then I began to stamp and heat emboss with gold.
Crafty tip: You need to do this to both sides of the petals, but do the underneath first, so any leaks will not damage the top of the petals.
I used a small die cut circle from the centre of the Time Traveller googles. It works as a good guide to keep you in the centre and began to build layers.
Alternating between the different stamped images.
Worked the petals into the centre in an alternating cross formation. I then added some of the tiny leaf dies in the middle and tiny glass beads, along with a flower centre. I then added strips around the edges of the box and box lid.
Blue flower card
The background for this was a base of blue Distress Ink. I then used Sheena's Create a Flower stencil Barking Mad and went over the top with two green Distress Oxides (hoping to get other colours in the future..sigh... that is such a long wish list! lol )
The petals were painted with Pebeo paint both sides, again underneath first. For the larger petals, as there are no stamps, you can add your own texture or effects. I chose to draw vein lines with a black pen as in the stamps from the collection. I used one petal with the round disc at the end and because I was creating a multi-layered flower, I cut off the other circle ends and applied the petals up to the edge of this centre. This would keep it flat. Again used the alternating cross formation to build the flower.
Falling leaves card
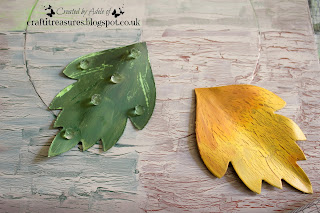
The background for this was made by applying Aquatints to my glass matt and misting them. I then took the Sheena card and pressed it into the colour.
I also misted the card after for more texture and left to dry.
The Elvish Mask! You shall go to the ball!! 😊
So it seems many of you loved this. I'm so glad you liked it, it really means a lot to me as I had so much fun making this. As promised this is how it was done. I took a sheet of A4 paper, folded it in half and drew my design on one side of it. Cut it out. I then opened it and drew round the template on Sheena card. Cut it out. I then stuck this mask to another sheet of Sheena card and cut it out again, so it was double the thickness.
I played about with the layout of the leaves.
I painted the mask and leaves with Pebeo paint back and front of both.
I covered the back in the same way I decorated the front. This gives you a professional finish ( as I don't believe in half measures) and adds strength too. Double win! 😄 The leaves were lined up to match either side and the holding stick was fixed in between these layers. I applied foils and glitter on selected parts. A mixture of 3D glue and tacky glue was used to build this.
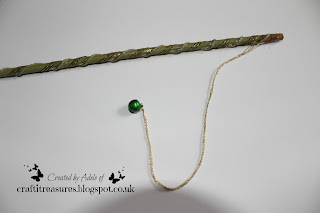
The stick, I stole from my orchid, sorry... I'm sure it won't miss it, well not yet as it is not currently in bloom and I should have found my others by then! lol. Painted it with Pebeo. I twisted ribbon and twine around it, added Stickles glitter glue and began to add bells on gold thread, attached to the top with red liner tape.
Seasonal plaque...
For this I wanted to make a statement piece and show how these will work so well with many of Sheena's other collections. I love nature and as the Crafter's Companions sentiment stamp says (see previous post) all the seasons are beautiful. I cut out 12 of each leaf size, 3 for each month. the largest I painted, different shades of green and one brown. PVA was then applied over the top to create a crackle effect.
When the glue was dry I then painted over the top with Pebeo paint again. Dark over light and light over dark, so opposing shades would show through. I then painted and stamped all the other leaves.
Took my large square plaque and painted it with black gesso and glued a painted circle to the centre, (drew round a dinner plate) and divided into quarters.
Painted quarters with chosen Pebeo colours.
Used the PVA technique on the board and applied more Pebeo paint over the top, choosing a pale neutral colour to add contrast and make it look more like bleached wood. Began to add the leaves with 3D glue.
Used largest leaves as the base, being guided by the lines and the circle underneath.
Worked the design into the centre with smaller and smaller leaves, adding other dies and stamps to represent each season.
Created a Distress Ink background on Sheena card and then cut out some die cut circle, 3 sizes, going upwards. Smallest in the centre.
Second size up, I accidentally damaged this but I wasn't worried as I was covering it anyway. I then added the third circle with the sentiment. Each circle had a layer of 3D glue between it as I needed to raise it above the centre leaves.
So now I've divulged all my crafty secrets I hope you enjoyed them and are feel inspired! And I actually waffled less this time!! lol.. There may be hope yet!!
I'm sure you will have as much fun as I did with these new stamps and dies.
Back soon with more projects.
Crafty hugs
Adele
x


